- Refresh the page
- Log out and log in again
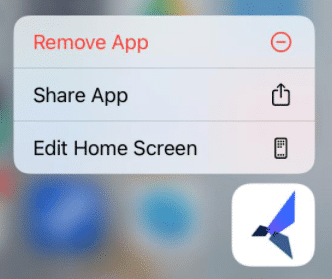
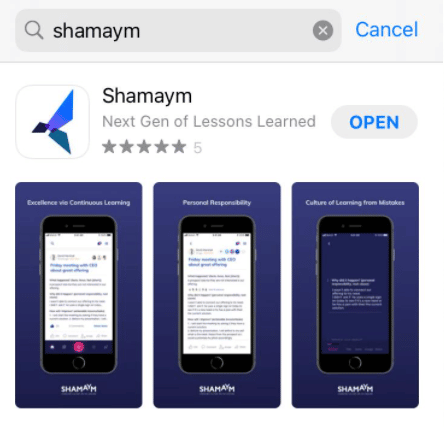
- Remove and reinstall the mobile app
- Remove

- Install

- Check your internet connection
- Verify user permissions (admin, team member, etc.) – does the user have permission to view the page they are trying to access?
- Try logging in through an incognito browser window
- Check that you are not using Internet Explorer (the Shamaym Platform supports only Google Chrome, Microsoft Edge, Safari and Firefox)
- Do a deep refresh: click and hold CTRL + F5
- Clear your browser cache in your browser’s settings
Please don’t hesitate to contact us, we will be happy to assist.
There are a few ways to contact our Customer Support team:
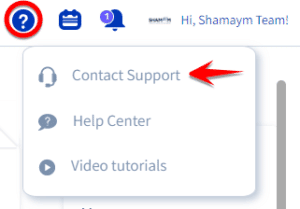
- Using the Support form
a. Web: available by clicking on the support icon> selecting “Contact Support”
b. Mobile: available by clicking on the menu> selecting “Contact us”


- 📧 At Help@shamaym.com


🐞 If It’s a bug, please elaborate on the following:
- Operating system (💻 Windows/ Mac | 📱 iOS/ Android)
- If it’s a mobile device- please specify the device type and version (Xiaomi, iOS 16, etc) and your Shamaym app’s version

- When did it happen? 🕒
- What steps can we follow to reproduce this? 👣
- What happened? 📝
- If possible, please provide screenshots/ links.

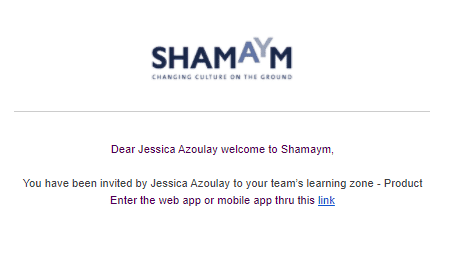
Welcome to Shamaym, the collaborative real-time learning platform that will help you and your team get better, faster.
To log in for the first time, follow these steps:
Web Platform and Mobile App
- If you are using the mobile app, make sure you’ve installed the app from your app store

- You should have received an email/ SMS invitation to join Shamaym. Open the invitation, and click on the link

- Please note that the link may be expired after a while. In that case, you will see an “expired” notification and should ask your client/ team manager to send you a new invitation.
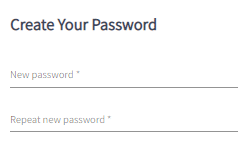
If you need any assistance, please don’t hesitate to contact us through the Support form or at help@shamaym.com - Create your password, login with your Microsoft account, or log in with SSO (Okta/ Ping)

- If you are not able to login with your Microsoft credentials:
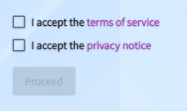
- Accept the terms and conditions, and click Proceed

- You’re now ready to start getting better, faster!
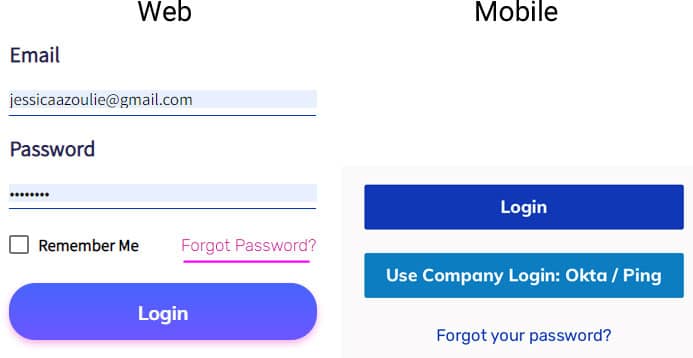
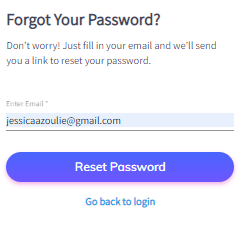
- Click on the “Forgot Password?” link

- Enter your email address and click ”Reset Password”

- You should have received a text message or email with a link to reset your password:
- Click on the link
- Create a new password, login with your Microsoft account, or log in with SSO (Okta/ Ping)
- If you chose to login with Microsoft, enter your credentials and allow access
- If you created a new password, you’ll be redirected to the login page. Use the new password and log in. Don’t forget to save your password!

Wait before you make any more attempts, and follow these guidelines:
- Check that you entered the correct email and password
- Make sure you typing in English
- Confirm that you entered the email address used to register for the Shamaym Platform, and not a different one
- If all email addresses are still correct, ask the Client Manager to send you a new invitation. You can also try resetting the password by clicking on “forgot password” (see “forgot password”)
Your account will be locked after 5 wrong attempts. To unlock your account, follow these steps:
- First, try to reset your password by clicking on “Forgot Password” (see instructions above)
- Second, if that didn’t work for you, ask the Client Manager to send you a new invitation
- Just so you know, an account that locks will unlock automatically after an hour
- If you need any assistance, please don’t hesitate to contact us through the Support form or at help@shamaym.com
- Please check your spam inbox
- Ask your team/ client manager to confirm the email address/ phone number which was entered into the platform (are there any extra spaces? Typos?)
You can log in to Shamaym with your Microsoft account, in the following ways:
- When you receive a “Welcome to Shamaym” invitation- please see the “Welcome to Shamaym” tab
- When you choose to reset your password by clicking on “Forgot Password”- please see the “I forgot my password” tab
- By syncing it through the user profile
- Log in
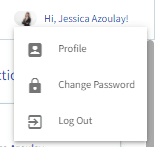
- Click on your user avatar on the upper right side and choose “Profile”

- Click on the Microsoft icon
- Log in to your Microsoft account
- If you are already logged in with a password, log in with your user name and password and sync an account through your user profile
- If you already synced your account, make sure you are using the right account
- If your company uses SSO, please login with Okta or Ping
- If you need any assistance, please don’t hesitate to contact us through the Support form or at help@shamaym.com

Please contact your Shamaym account manager or contact us through the Support form or at help@shamaym.com
Debriefing regularly is the simplest way to jump-start your team’s learning and improvement. It makes it easy to think about fast ways to improve, share them with your team, and implement them immediately.
Web
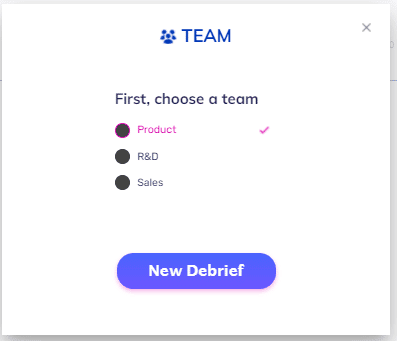
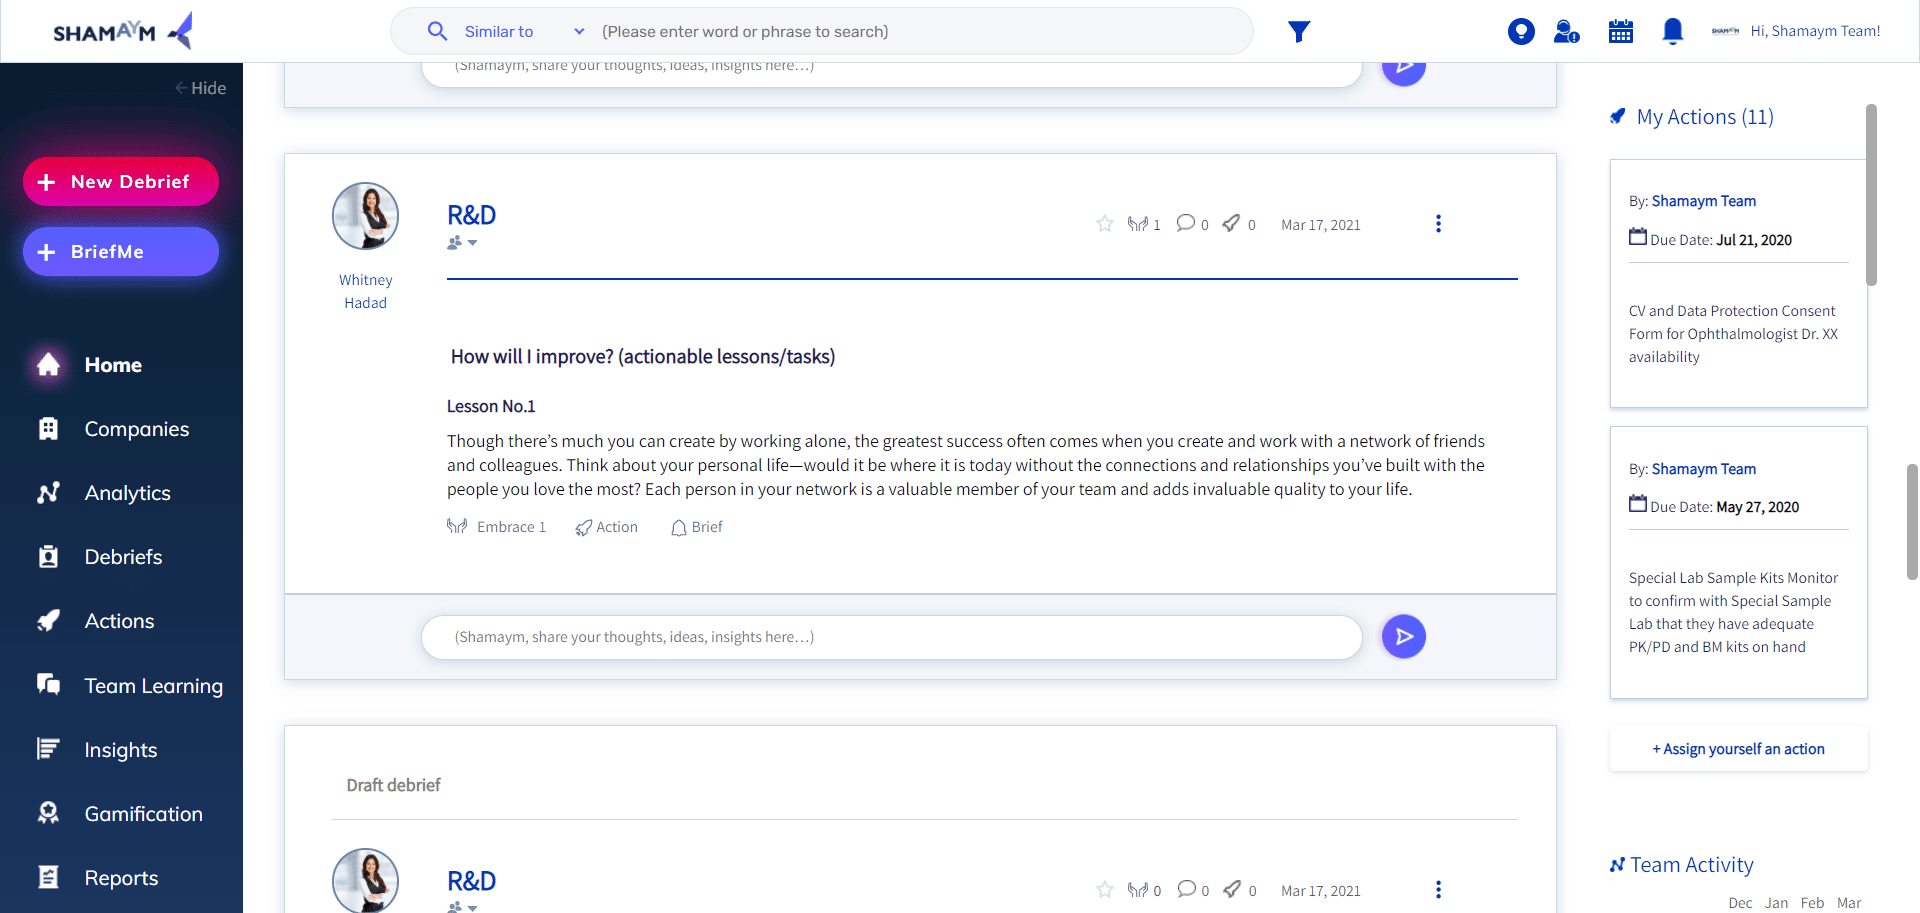
- Click on the “New Debrief” button

- If you belong to several teams, choose the team this debrief is most relevant to. If you’re only in one team, you’ll automatically move to the next step

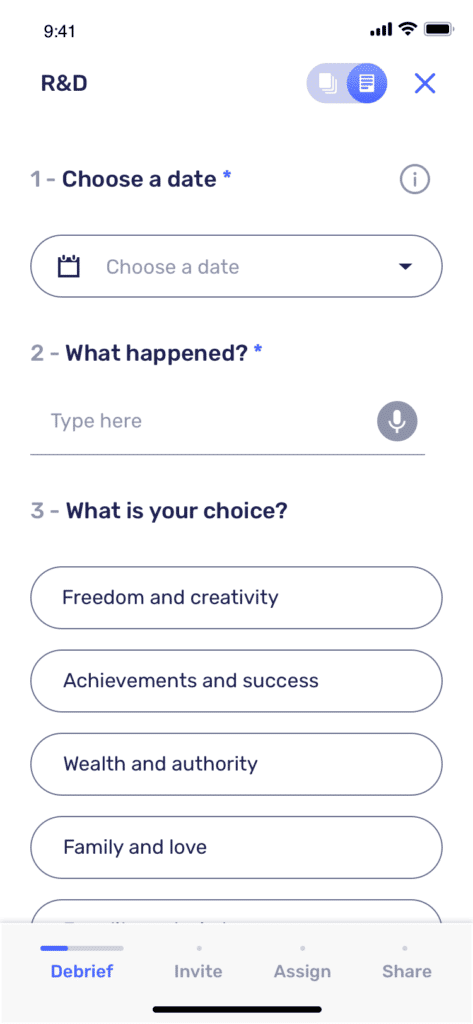
- Your debrief form will open. Keep in mind that each team has its own, customized debrief format, so yours might look different than a colleague’s on another team.
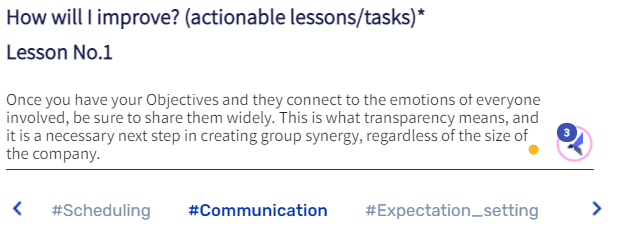
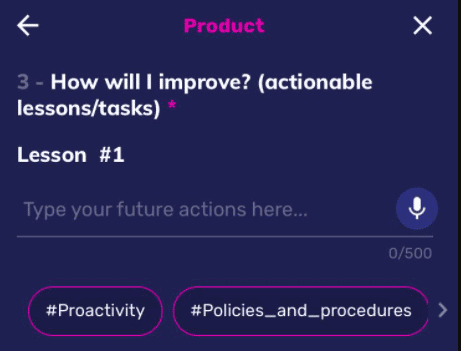
- Write your debrief lessons, keeping in mind that some questions might be required. You can write up to 5 lessons in one debrief.


- Adding tags to your lesson helps teammates understand what the debrief is about, and helps everyone search for it more easily later.

- You can also assign this lesson as an action item, or make it a brief.

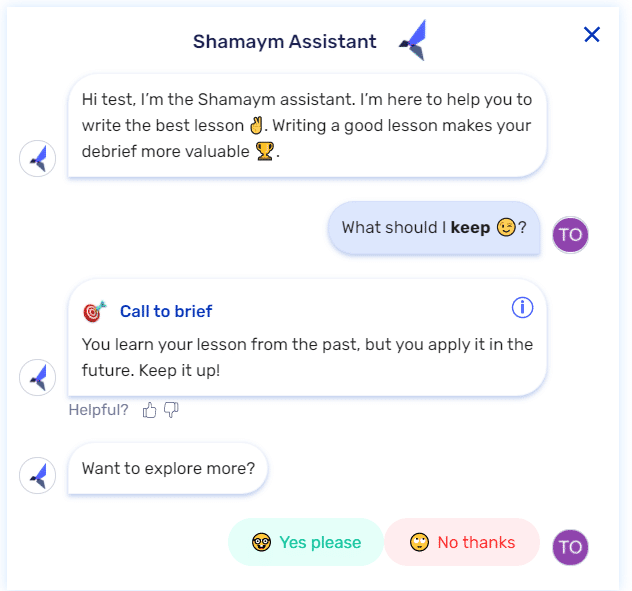
- Additionally, you can invite others to collaborate. To learn more about collaborative debriefing, take a look at the collaboration video/ tab
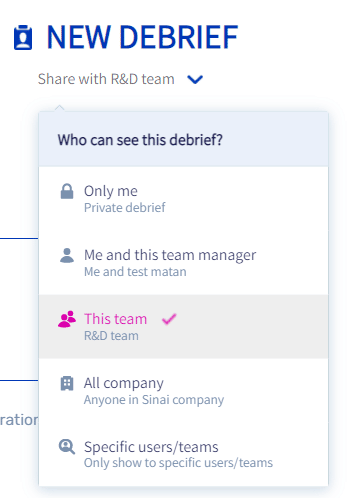
- By default, the debrief will be shared with your team, but you can change the sharing settings on your debrief to control who can read it once it’s published. This can be only you, you and your manager, your whole team, the entire company, or specific people that you choose.
Scroll all the way up to change the sharing settings.
- When you finish writing your debrief, click “publish” and your debrief will be shared based on the settings you selected.


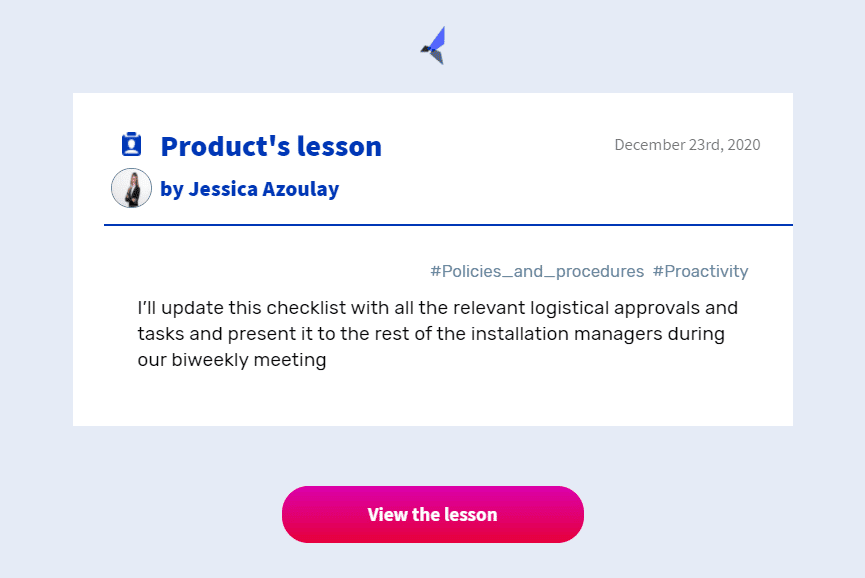
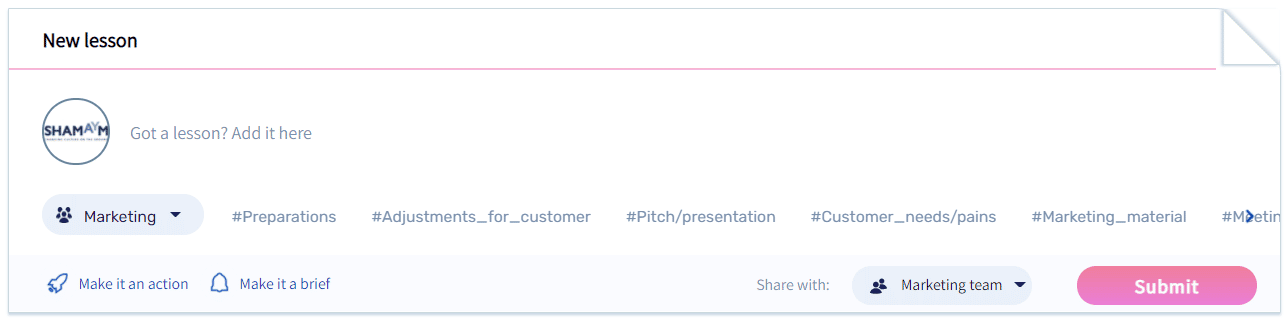
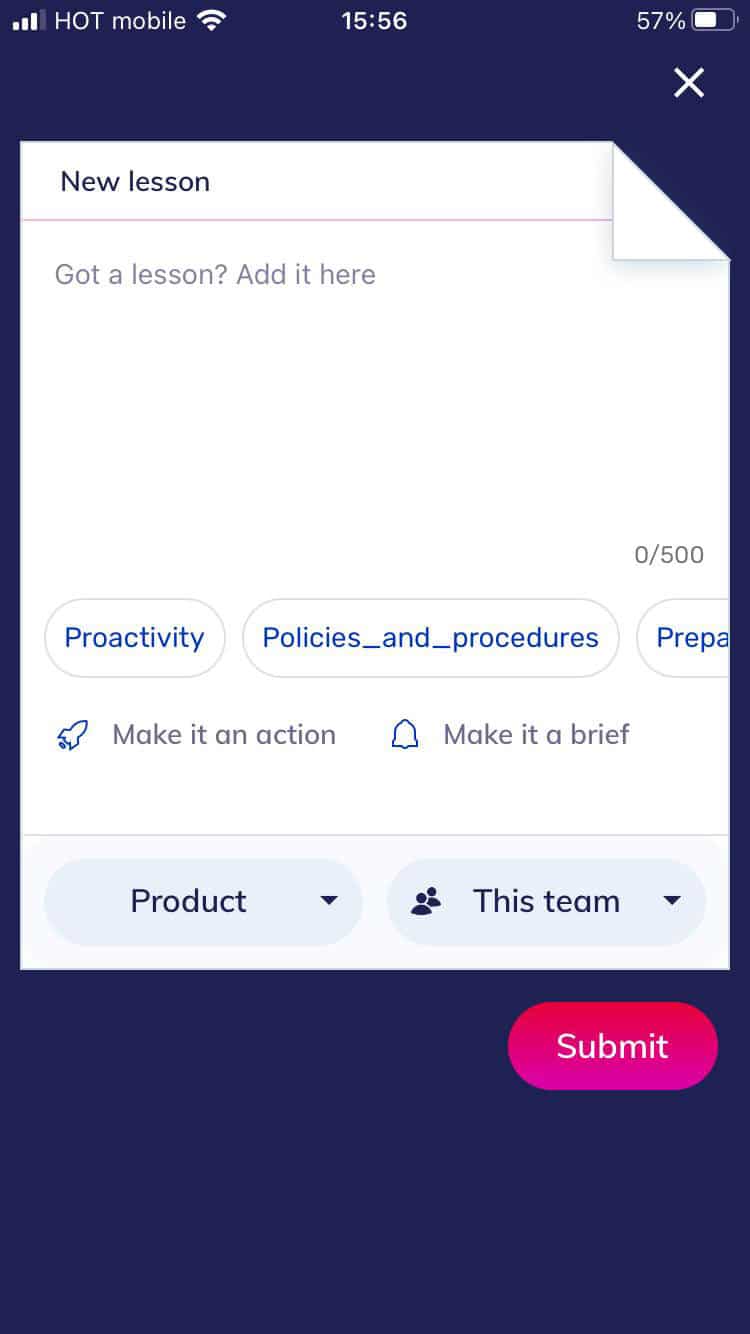
- If you have just one valuable piece of learning to share with the team, you can also write your lesson in the “new lesson” field at the center of your homepage. Note that Shamaym Assistant won’t offer feedback when you write a single lesson. Type in your lesson, choose a team, add tags, and click submit. This lesson will also appear on your feed and in your inbox.


Mob
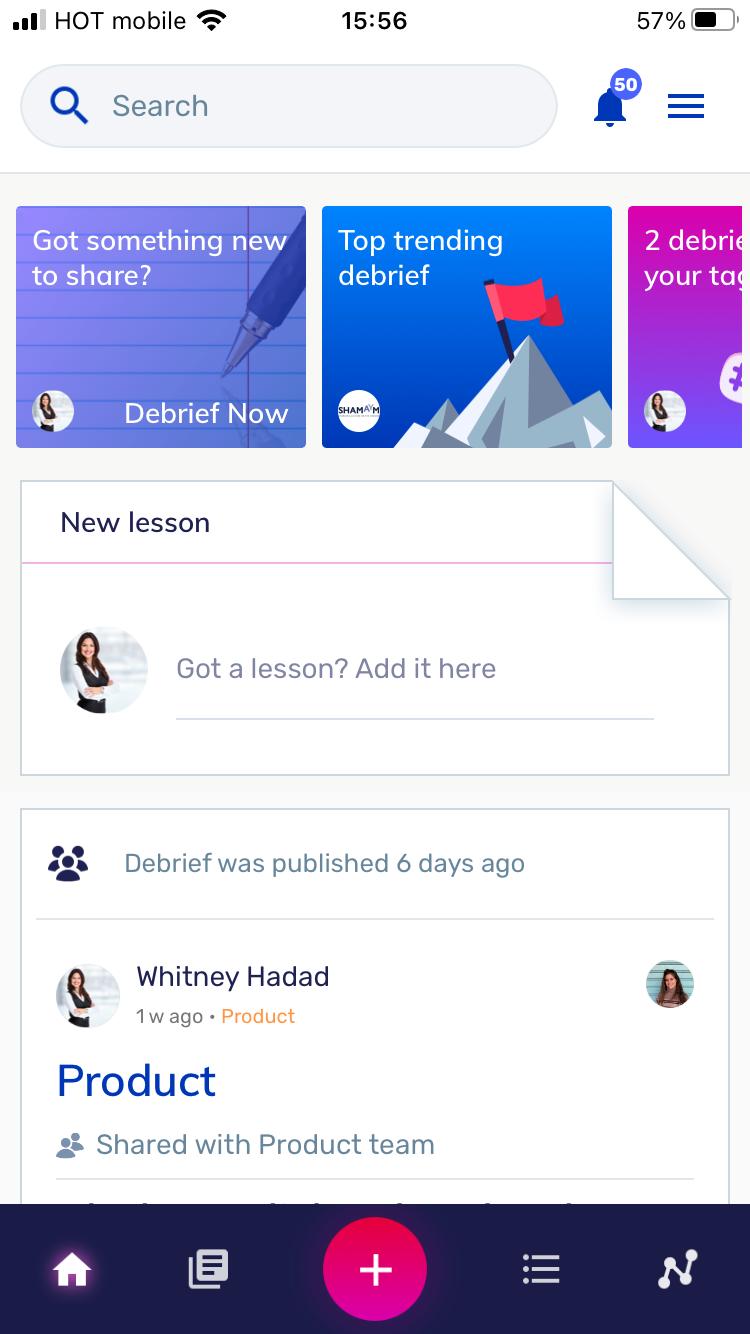
- Click the plus sign and then “new debrief”. If you belong to several teams, choose the team this debrief is most relevant to. If you’re only in one team, you’ll automatically move to the next step.

- Now your team’s debrief form will open. Keep in mind that each team has its own, customized debrief format, so yours might look different than a colleague’s on another team.
- Write your debrief lessons, keeping in mind that some questions might be required. Adding tags to your lesson helps teammates understand what the debrief is about, and helps everyone search for it more easily later.

- You can also assign this lesson as an action item, or make it a brief.

- By default, the debrief will be shared with your team, but you can change the sharing settings on your debrief to control who can read it once it’s published. This can be only you, you and your manager, your whole team, the entire company, or specific people that you choose.

- Additionally, you can invite others to collaborate. To learn more about collaborative debriefing, take a look at the collaboration video/ tab.
- Finally, you can add additional action items.
- When you finish writing your debrief, click “publish” and your debrief will be shared based on the settings you selected. The debrief will appear on your Shamaym homepage, and in your inbox.
- If you have just one valuable piece of learning to share with the team, you can also write your lesson in the “new lesson” field at the center of your homepage. Type in your lesson, choose a team, add an action item and/or brief, and click submit. This lesson will also appear on your feed and in your inbox.
- Click “Publish”


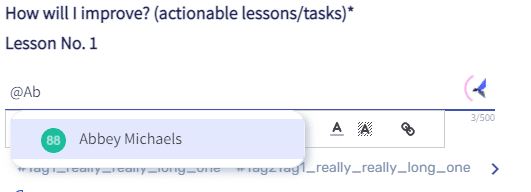
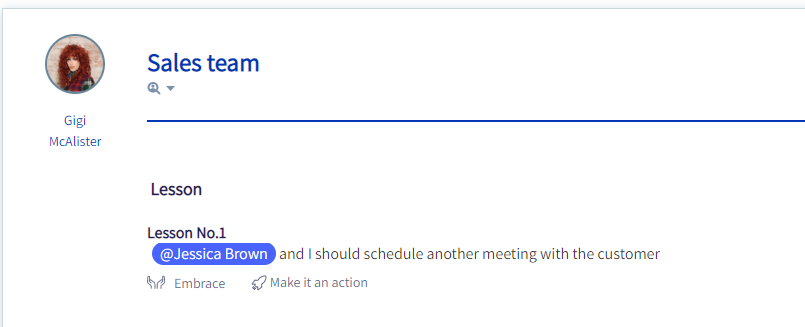
Communicate with your team by @mentioning people as you write your debrief.
- In any free-text component*, you can add a “@” and pick the user which you’d like to mention.
*Currently not available on the “table” component
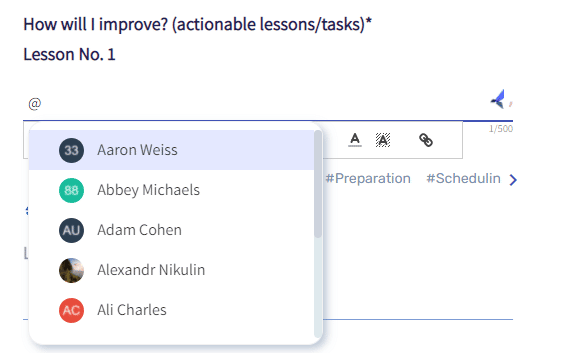
- You can mention anyone from the company/ organization. The users’ list is sorted a-z by default and is updated according to what you type. Later on, it will be sorted according to your most recent mentions.
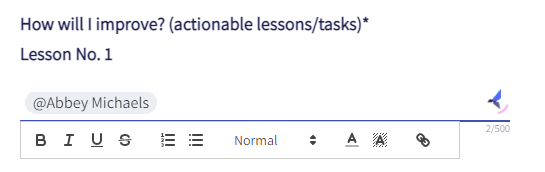
- The @mentioned person will be added to the viewers’ list of the debrief (will get permission to watch it).
- When you’re @mentioned, you’ll see it on the platform
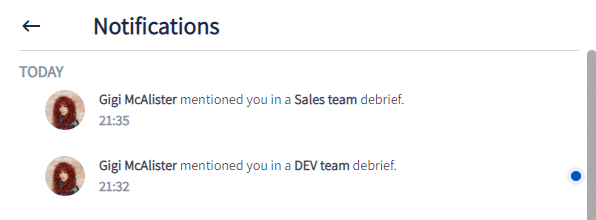
Notifications
- When you’re @mentioned, you’ll get a notification in the bell icon on the platform


- You’ll also get an email notification.
*Changing the team’s/ personal notifications settings does not affect the email notification about the mention, it is always sent. In the future, you will be able to customize the notifications for the mentions on the notifications center.

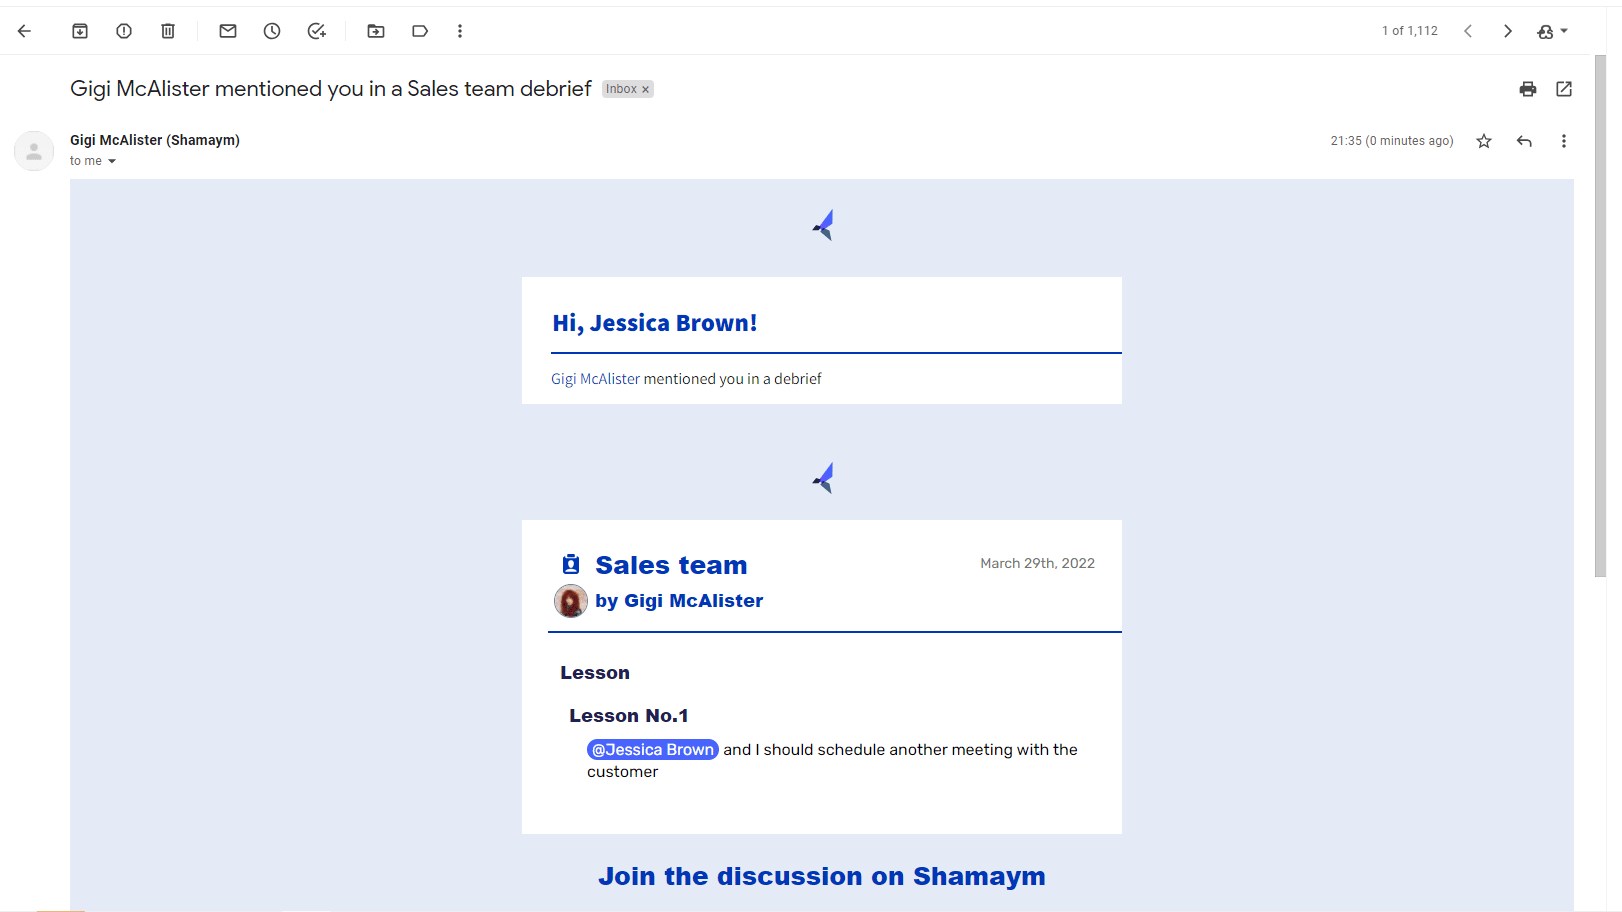
- The @mention email notification is instead of the debrief publication notification, so you won’t get multiple notifications for the same debrief.
- If you were mentioned a few times on the same debrief, you’ll get only 1 notification
- If you were mentioned in a collaborative debrief:
- If you are a collaborator: you’ll get the notification in real-time
- If you are not a collaborator: you’ll get the notification once the debrief is published
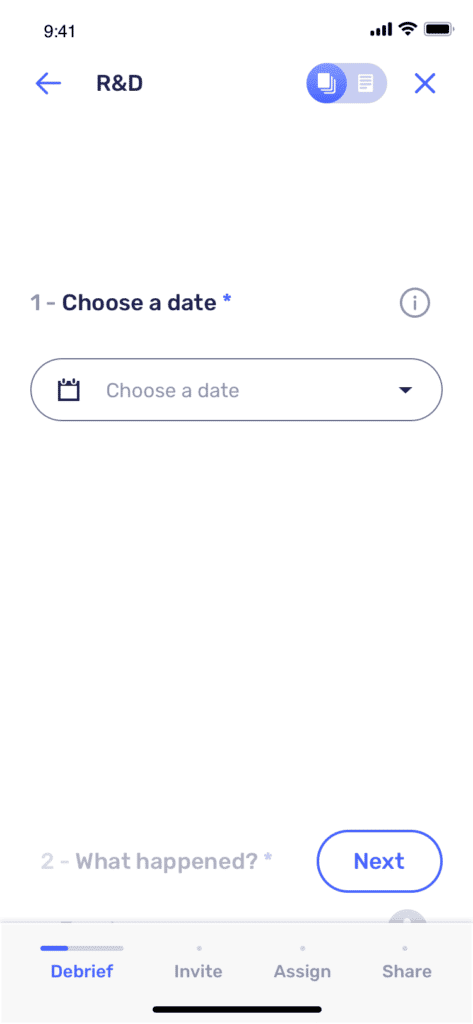
When writing a new debrief, you can select between 2 views:
- Step view: each question appears separately on each page. You can navigate using the “Next” button, making it more easy for you to focus at one question at a time.

- Scroll view: all questions appear in a continuos view. You can scroll up and down, making it easier for you to cut-paste or copy-paste your input across the different questions and quickly edit what you’re writing across the debrief efficiently and promptly.
- The platform will remember your selection and the next time you will create a new debrief, it will be open with the preferred view.
- Web
Mobile
- Web
Mobile
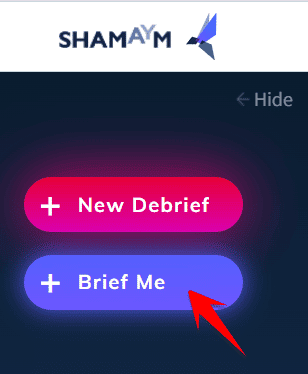
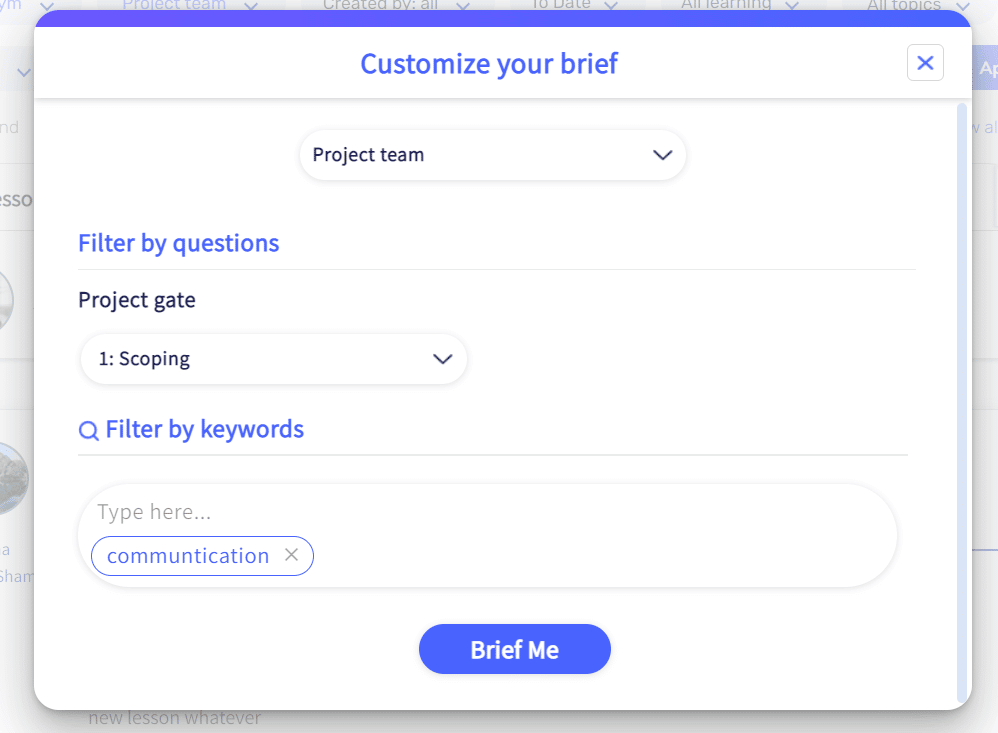
See the information you need instantly. The Brief Me button shows the topics, debriefs, and lessons relevant specifically for you – at a click of a button.
- Click on the “Brief Me” button

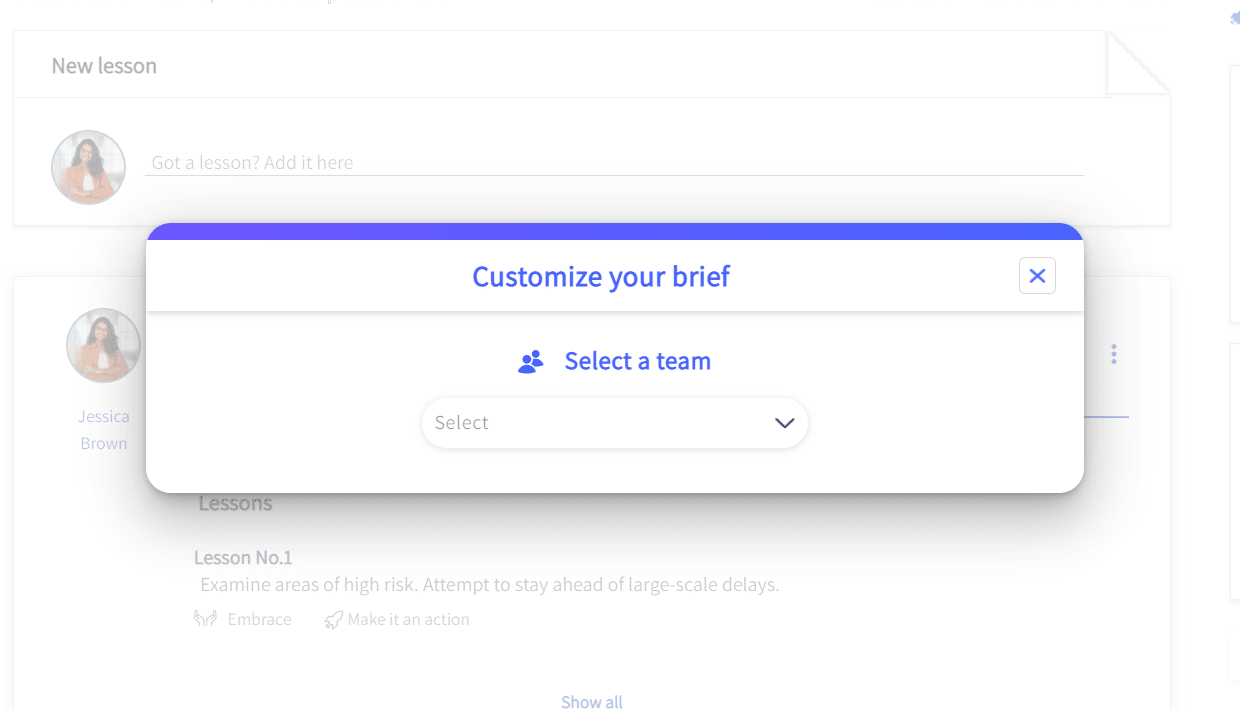
- A popup will open, where you can select the relevant team
*If you only have one team you’ll be redirected to the next step
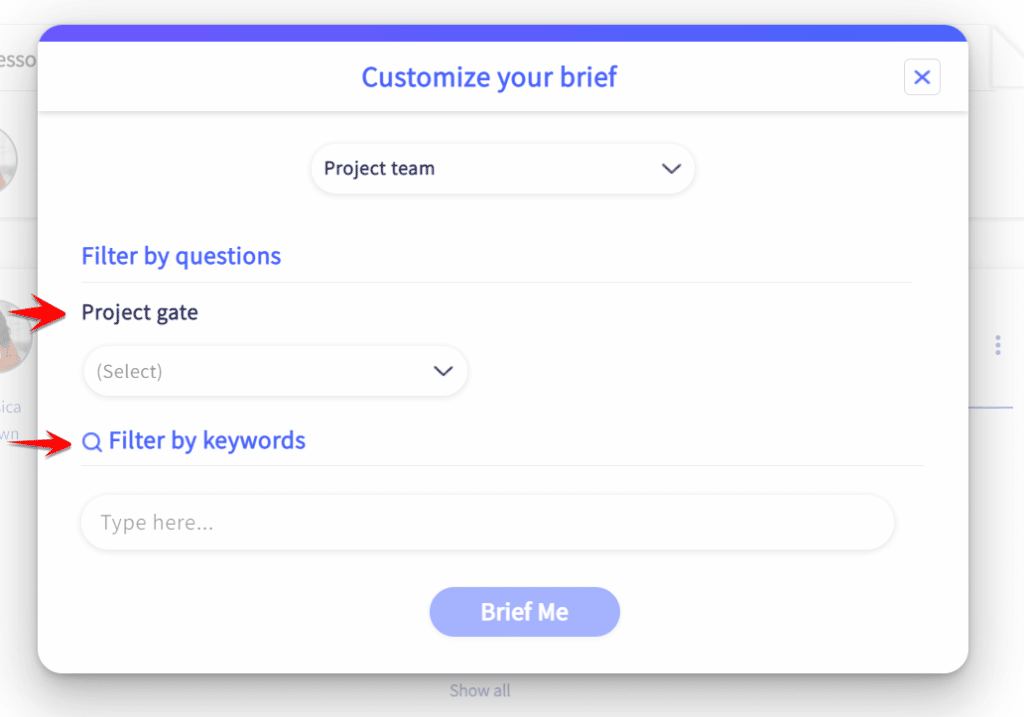
- After selecting the team, you should be able to answer selected questions (*selected by the team manager- see explanation below), and you’ll also have the ability to get the most relevant results by searching for relevant keywords.


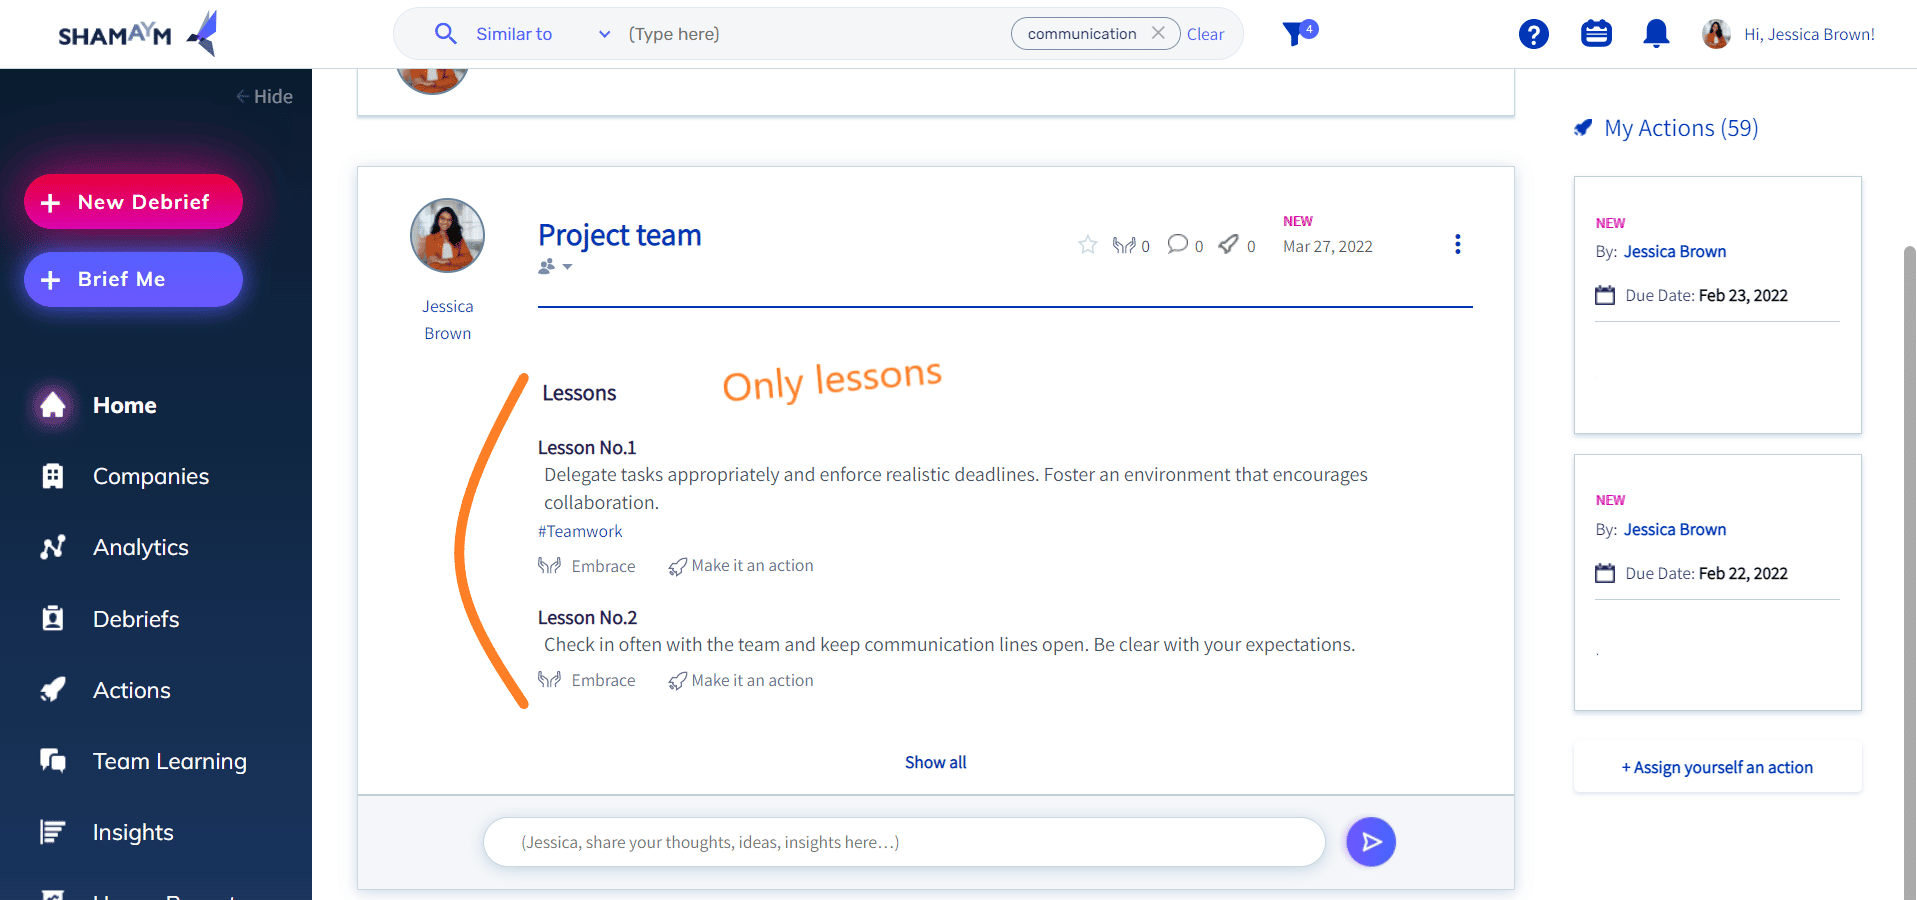
- Clicking on the “Brief me” button will show you the most relevant debriefs/ lessons*, according to your preferences
*If your team has a lessons component in its format, you’ll see only the relevant lessons (“Show only lessons”). If your team doesn’t have lessons in its format, then you’ll see the selected questions and other components that are marked as “Show on homepage” on the team’s debrief format.
For example:
With lessons in the format: Show only lessons
Without lessons: “Show on brief” and “Show on homepage”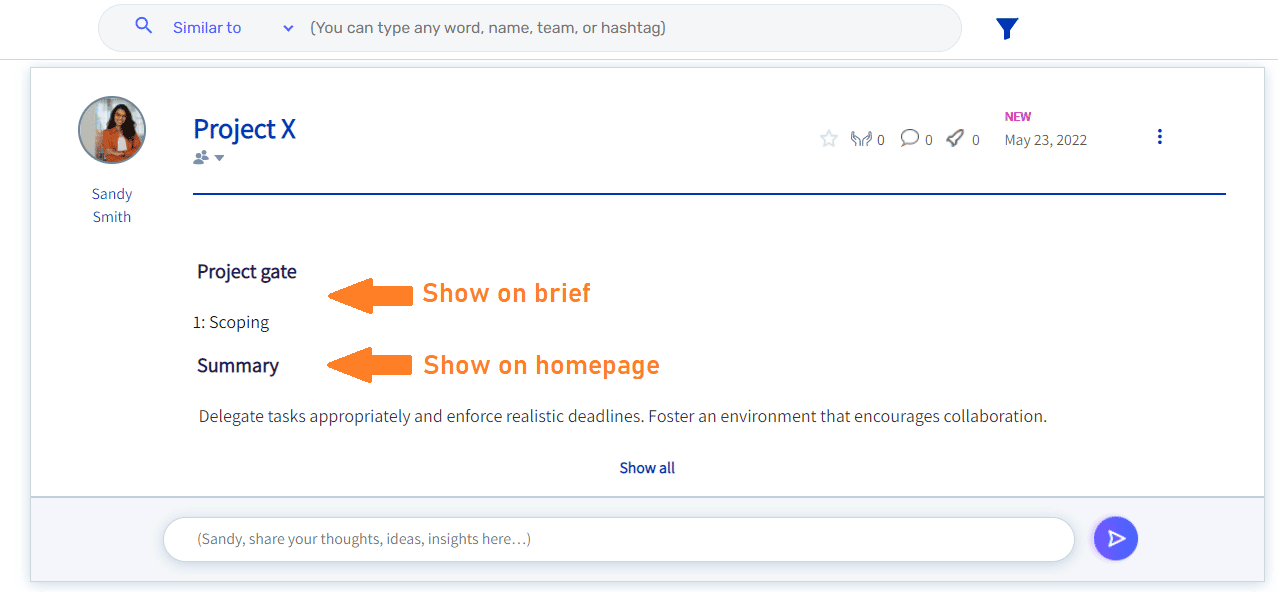
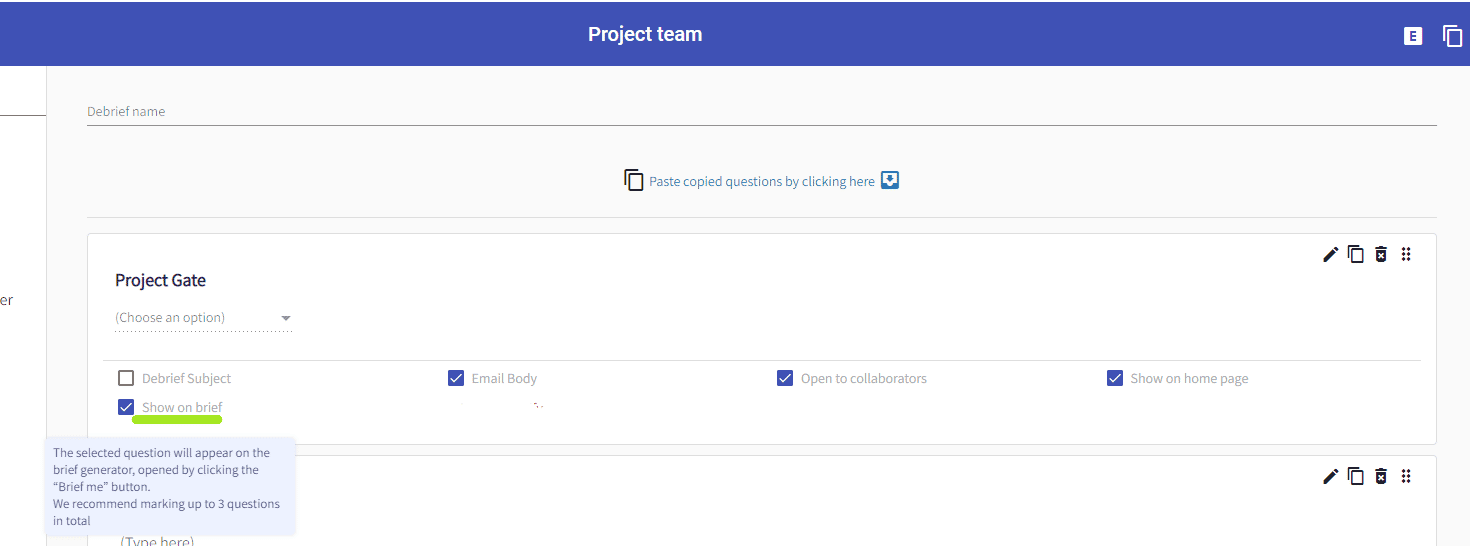
- First, go to your team’s debrief format and mark the questions which you think are relevant for your brief as “Show on brief”.
The selected question/s will appear on the brief generator popup.
i. For now, you can only mark “closed” questions as “show on brief” (Multiple-choice, checkboxes, cascading dropdown, dropdown)
Shamaym Analytics collects data from your items to create charts that provide insights into your workspaces.
Get a high-level view of everything that is important to you, create, and organize charts and dashboards to have all the tools and information you need in one view.
Will be added soon
Will be added soon
Note: this ability is only available for accounts that have the Advanced Analytics plan. For more information, please contact your CS Manager.
What’s new?
The new changes are described in the “What’s new” popup, which you can view anytime by clicking on the 
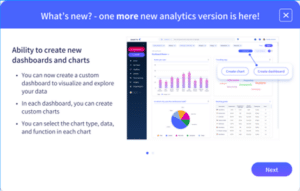
Create new dashboards
You can create dashboards from scratch in addition to the default dashboard that the platform offers.
- Who can create a new dashboard? 🤔
Any user can create a new dashboard. - Who can view the new dashboard? 🤔
Anyone with access to one or more items (whose data is included in the dashboard).
🚩 Note: one can see data based on their permission. One will not see data from items to which they don’t have permission. - Who can edit/delete the dashboard? 🤔
Only the user who created the dashboard and the company admins. - How to create a new dashboard? 🤔
- Start by clicking the “Create dashboard” button on the top right-hand side of the analytics page.

- You can rename the default name of the dashboard by double-clicking on the name.

🚩 Note: max length of the dashboard name is 50 chars. - Now, you can add new custom charts to your dashboard.
- Start by clicking the “Create dashboard” button on the top right-hand side of the analytics page.

Create new charts
You can create a custom chart to visualize and explore your data. It can be used to get cross-data analytics.
- Who can create new charts? 🤔
Any user can create new charts in their own dashboards. - How to create a new chart? 🤔
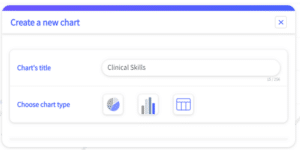
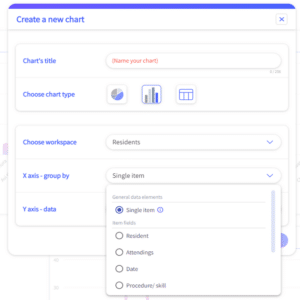
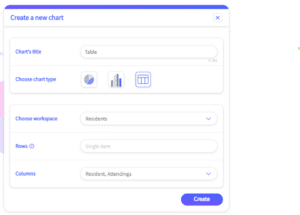
- Start by clicking on the “Create chart” button

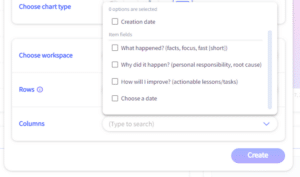
- Customize the chart’s title

- Select the chart’s type
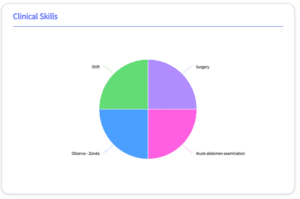
There are 3 types of charts: pie, bar, and table.- Pie chart
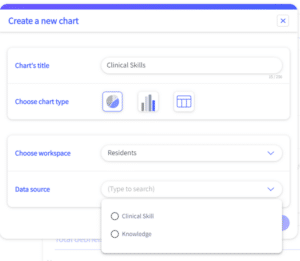
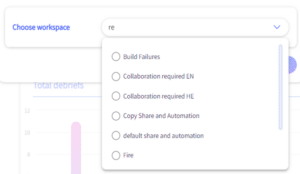
- Select the workspace
- Then, select the data source (the field from which the data will be taken)

- 🤓 Good to know: you can select any closed question as a data source (checkboxes, multiple choice, dropdown, scale, user list, cascading dropdown, table dropdown, date picker)
- Click “Create”
- Your pie chart is created:

- Pie chart
- Start by clicking on the “Create chart” button

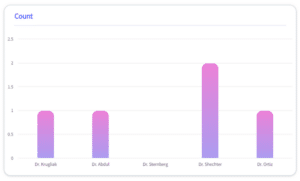
- Bar chart
- Select the workspace
- Then, select the X-axis data source

- 🤓 Good to know: you can select any closed list field as a data source for the X-axis (checkboxes, multiple choice, dropdown, scale, user list, cascading dropdown, table dropdown, date picker) and item creator,
Or, you can select that the X-axis will be an item. That means that each column = value from a single item.
- 🤓 Good to know: you can select any closed list field as a data source for the X-axis (checkboxes, multiple choice, dropdown, scale, user list, cascading dropdown, table dropdown, date picker) and item creator,
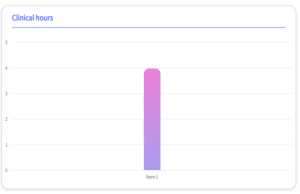
- Bar chart
- Select the Y-axis data source

- 🤓 Good to know: If the X-axis is a closed list field, then the Y-axis can be a count of the items or it can be a scale/ numeric field (in this case the value displayed is the average value)
- 🤓 Good to know: If the X-axis is an Item, then the Y-axis can be a scale/ numeric field only.
- 🤓 Good to know: If the X-axis is a closed list field, then the Y-axis can be a count of the items or it can be a scale/ numeric field (in this case the value displayed is the average value)
- Click “Create”
- Your pie chart is created:


- Select the Y-axis data source


- Table
- Select the workspace
🤓 Good to know: for now, rows’ data it’s only items. That means that each row = is an item - Select the columns’ data


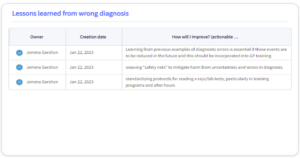
🤓 Good to know: the columns’ data source can be any type of field (except for the table field) and/or it can be the creation data and/or it can be the item creator’s (owner) name - Click “Create”
- Your pie chart is created:
- Select the workspace
- Table
- For example:
In each row, you can see for each item its creator, its creation date, and the lessons
- For example:
- 🤓 Good to know: in each dropdown, you can type to search

- 🤓 Good to know: after creating a new chart, the page will be automatically scrolled down to the newly created chart
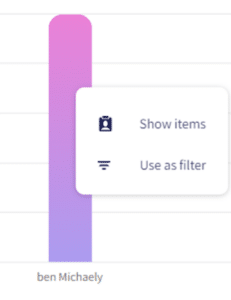
- 🤓 Good to know: by right-clicking on a segment in a bar/pie chart you will be able to:

- Use as a filter: the segment will become an advanced search filer segment, and the analytics page will be filtered accordingly
- Show all items: will open a pop-up with all the items related to this segment

- 🤓 Good to know: in each dropdown, you can type to search

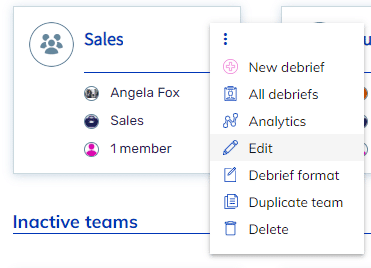
- Go to the “My Teams” page

- Click the 3 dots near the team’s name
- Select “Edit”

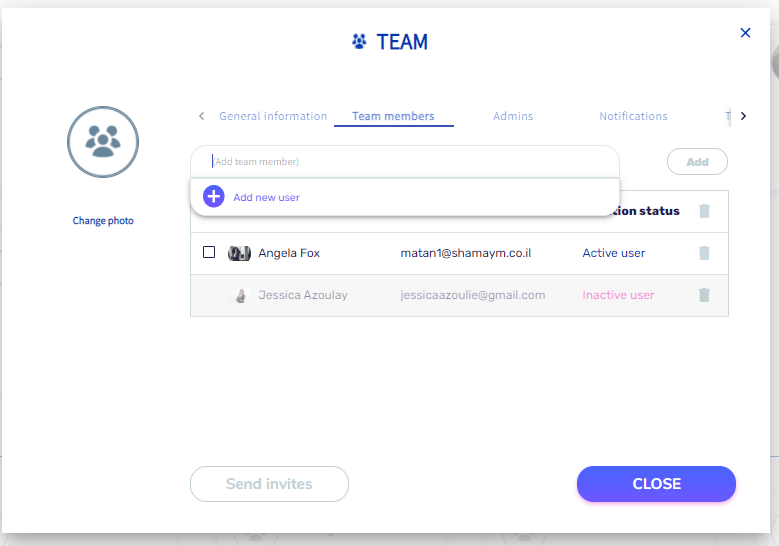
- Click on the “Team Members” tab
- Click the search line
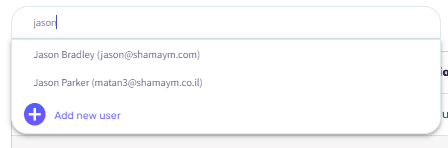
- Click “Add New User”/ search for an existing user


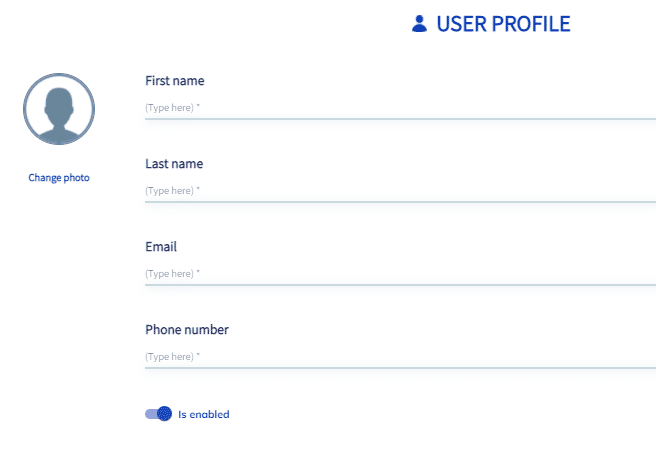
- Fill in the user’s details
– Make sure you add valid details
– Make sure you add an area code for each number (+972 for example) or if you don’t want to add any just write “+0”
- Click “Save” and then “Save” again
- The user has now been added. In order for the user will be an active member, click the square next to the user’s name → Click “Send invites/ Save & Send” → and then “Close”

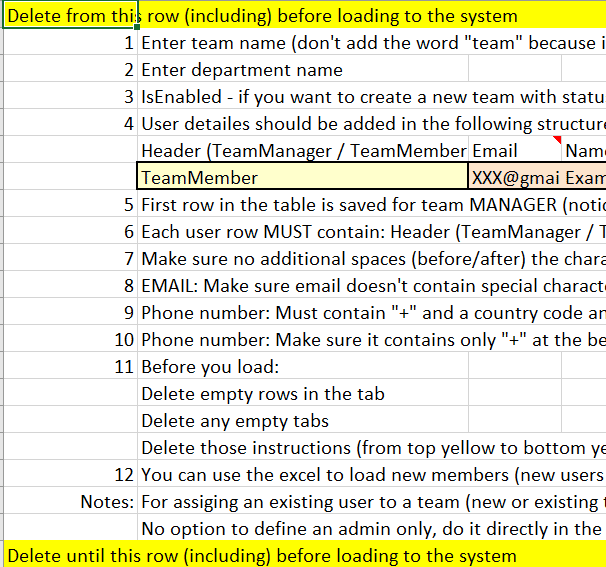
To create new teams and add new users, please use this template.
- At the top of the file, are all the instructions for using it.

- The instructions should be deleted once you’re done
- You can upload multiple teams at a time- just make sure each team is in a separate tab

- Team’s details should be added in the following structure:

- Team name
Enter the team name at the “Enter team name here” cell- don’t add the word “team” because it will be added automatically after loading, in the debrief form. - Department name
Enter the department name at the “Enter department name here” cell - IsEnabled
If you want the team to be enabled, you should write TRUE in this field. If you want the team to be disabled, write FALSE (Recommended: TRUE)
5. User’s details should be added in the following structure:
- TeamMember / TeamManager
NOTE: There can only be 1 team manager for each team. The team manager has to be in the first row. - Email
NOTE: Make sure the email is correct, valid and that there are no redundant spaces - Name
- Last Name
- Phone number
NOTE: Make sure you add an area code for each number (+972 for example) or if you don’t want to add any just write “+0”.
Make sure the phone number is correct, valid and that there are no redundant spaces - IsEnabled
If you want the user to be enabled, you should write TRUE in this field. If you want the user to be disabled, write FALSE (Recommended: TRUE)
6. Before loading:
- Make sure all the data you’ve entered is valid (Team name, Department name, Team manager, Team members, Usernames, Emails, Phone numbers, Enabled status)
- Review the instructions and make sure you haven’t missed anything
- Delete all empty/ redundant tabs
- Delete all empty/ redundant rows
- Make sure the format is exactly like it should be, with all required fields and without any additions
7. Examples for invalid file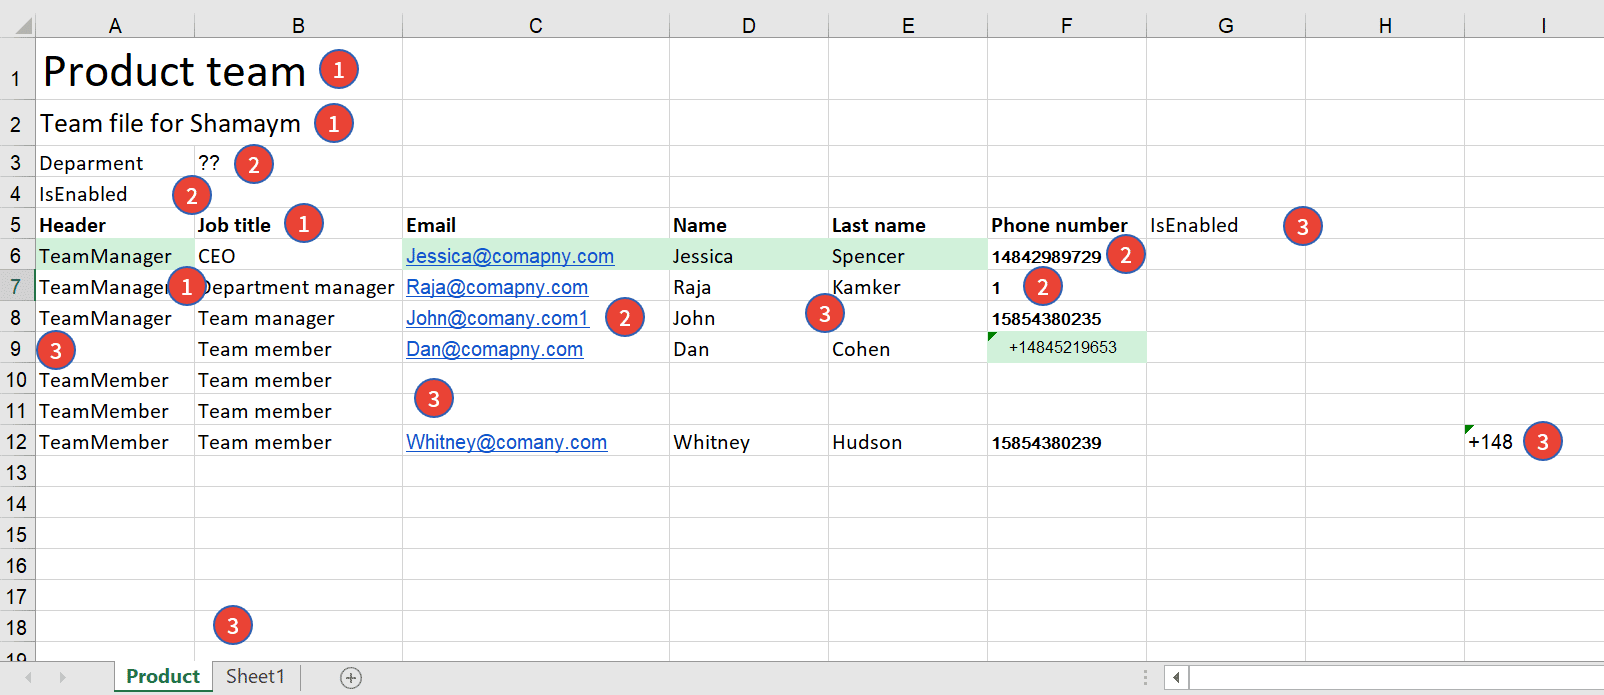
- Unmatching format- make sure everything is according to the format, with no extra additions

- Valid data- Make sure all the data you’ve entered is valid (Team name, Department name, Team manager, Team members, Usernames, Emails, Phone numbers, Enabled status)
- Missing/ redundant data- make sure you’ve added all the required data. Review the instructions again if necessary and remove all redundant data.

- Go to “My Teams” page
- Click the 3 dots near the team’s name
- Choose “Debrief Format”
Go to “My Teams” → Click the 3 dots on the team you want → Select “Debrief Format” → Click the Excel icon on the upper right corner.
The Team Learning is a Collaborative learning tool.
Collaborative Learning is a training methodology where employees share their knowledge and expertise, teaching and learning from one another at the same time. Group learning enhances the training experience by capitalizing on each employee’s skills, ideas, and institutional knowledge.
Collaborative Learning encourages higher-level thinking, problem-solving, and teamwork but is much easier to scale across teams.
Collaborative Learning is part of a larger trend toward interdependence. Organizations are moving away from more hierarchical top-down management styles and toward low-authority, high-accountability models. Instead of individual project ownership, we’re relying more and more on group work to achieve outsized results.
In other words: We work in teams, so why wouldn’t we learn as a team?
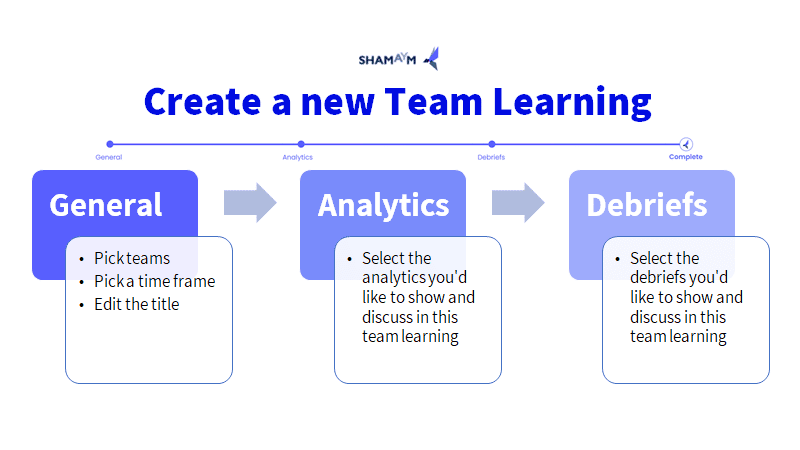
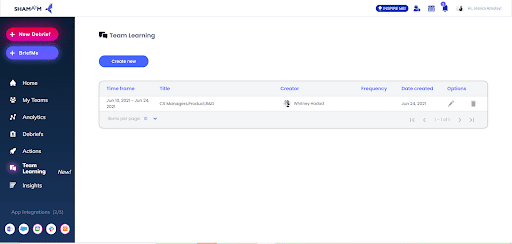
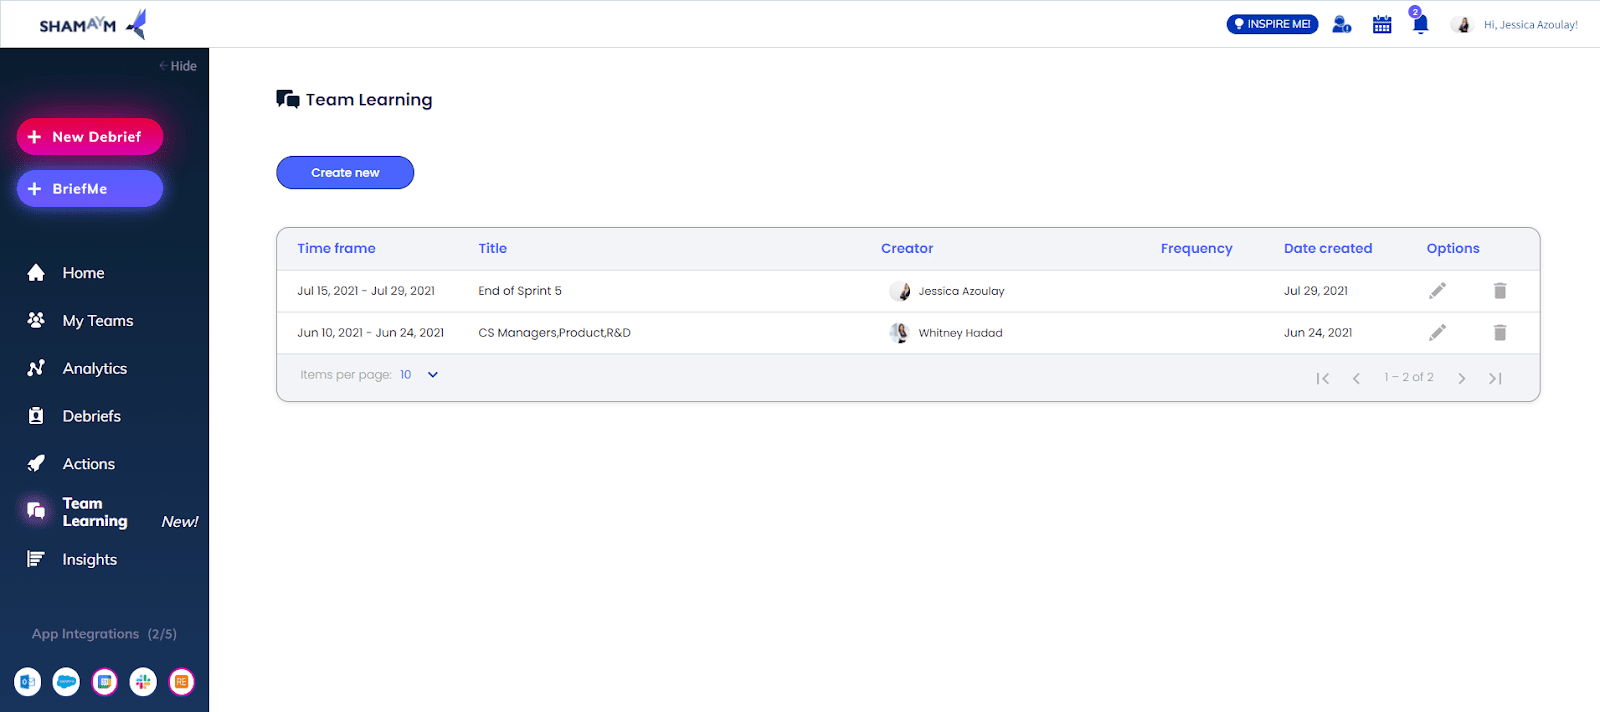
Create a new Team Learning quickly in just 3 easy steps.
- Open the Team Learning page.

- Click on the “Create new” button.
Step 1
- pick teams and a time frame (your choice will apply on all other steps)
- You may edit this learning’s title
- Click “Next”


Step 2
Select the analytics you’d like to show and discuss in this team learning. Just mark/ unmark the checkbox/es and click Next. It’s possible that there is no available data for the selected time frame and/ or teams.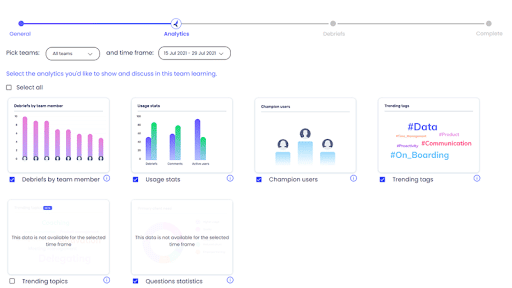
What are the Analytics you may show?
Debriefs by team member: The number of debriefs written by each team member during the defined time frame.
Usage Stats: The number of debriefs, active users, and comments during the defined time frame, compared with the previous time frame.
Champion Users: Team members who have the highest engagement in Shamaym.
Trending tags: The most common tags used by team members.
Trending topics: The most common topics discussed in debriefs by team members.
Question response stats: A breakdown of responses to all the questions in the defined time frame
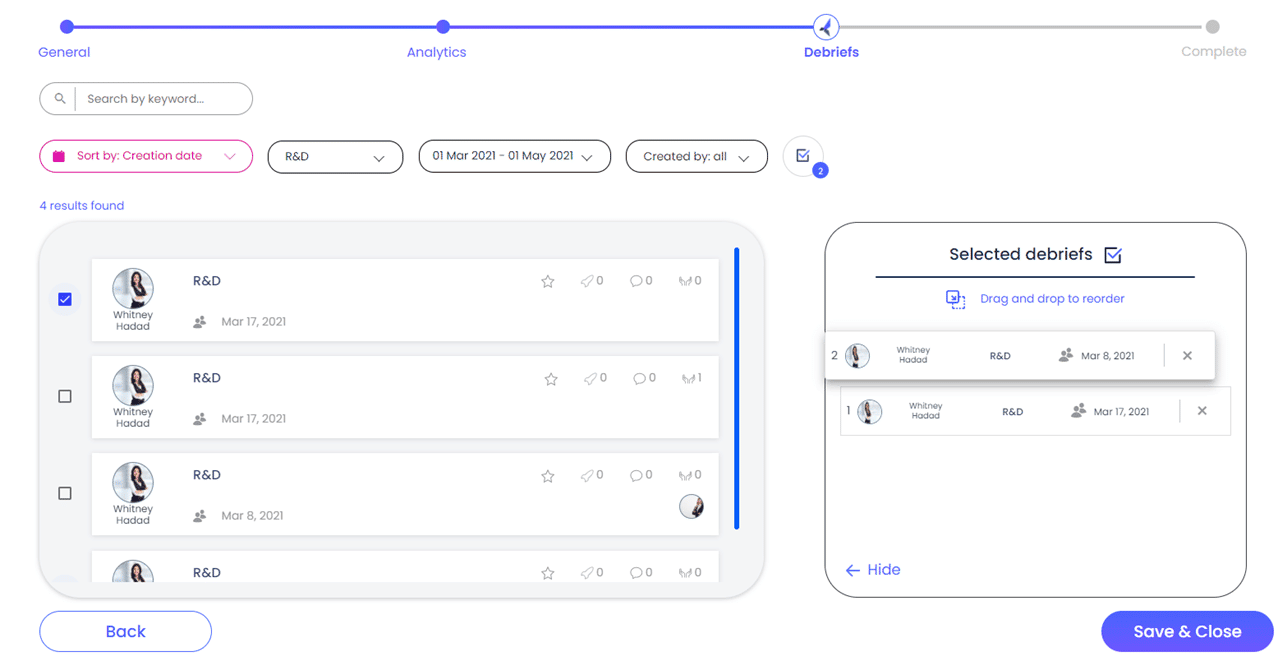
Step 3
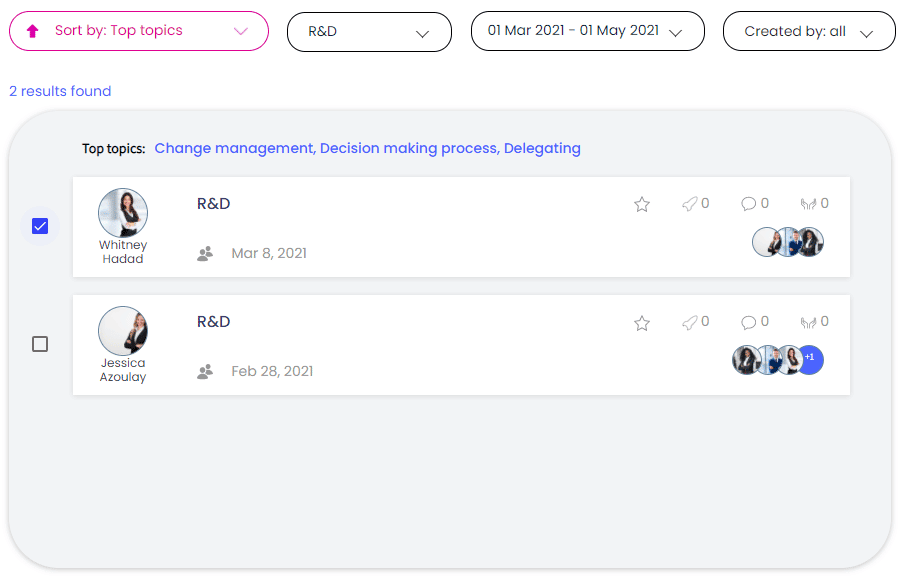
Select the debriefs you’d like to show and discuss in this team learning. By default, it will present the debriefs of the team/s, and within the time frame you picked, but you can change it if you’d like.

How?
- Clicking on the debrief will open its preview.
- Mark the checkboxes of the debriefs you’d like to discuss.
- It will then appear on the list, where you can drag and drop debriefs to reorder them.

- Click Save & Close.
Finding debriefs easily
You can search debriefs by keywords in the search bar.
You can also sort debriefs by:
- Creation date
- Relevance
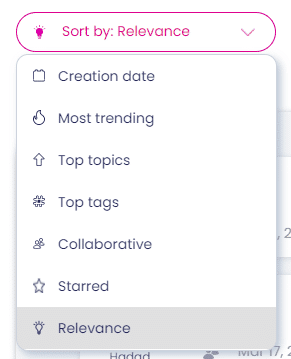
Or show only:
- The most trending debriefs
- The debriefs with the most popular topics
- The debriefs with the most popular tags
- Collaborative debriefs
- Debriefs you starred
Now, your team learning is created.
On the main page, you can see team learnings which you or your teammates have created. You can edit and delete some of them, and can view them by clicking on them.
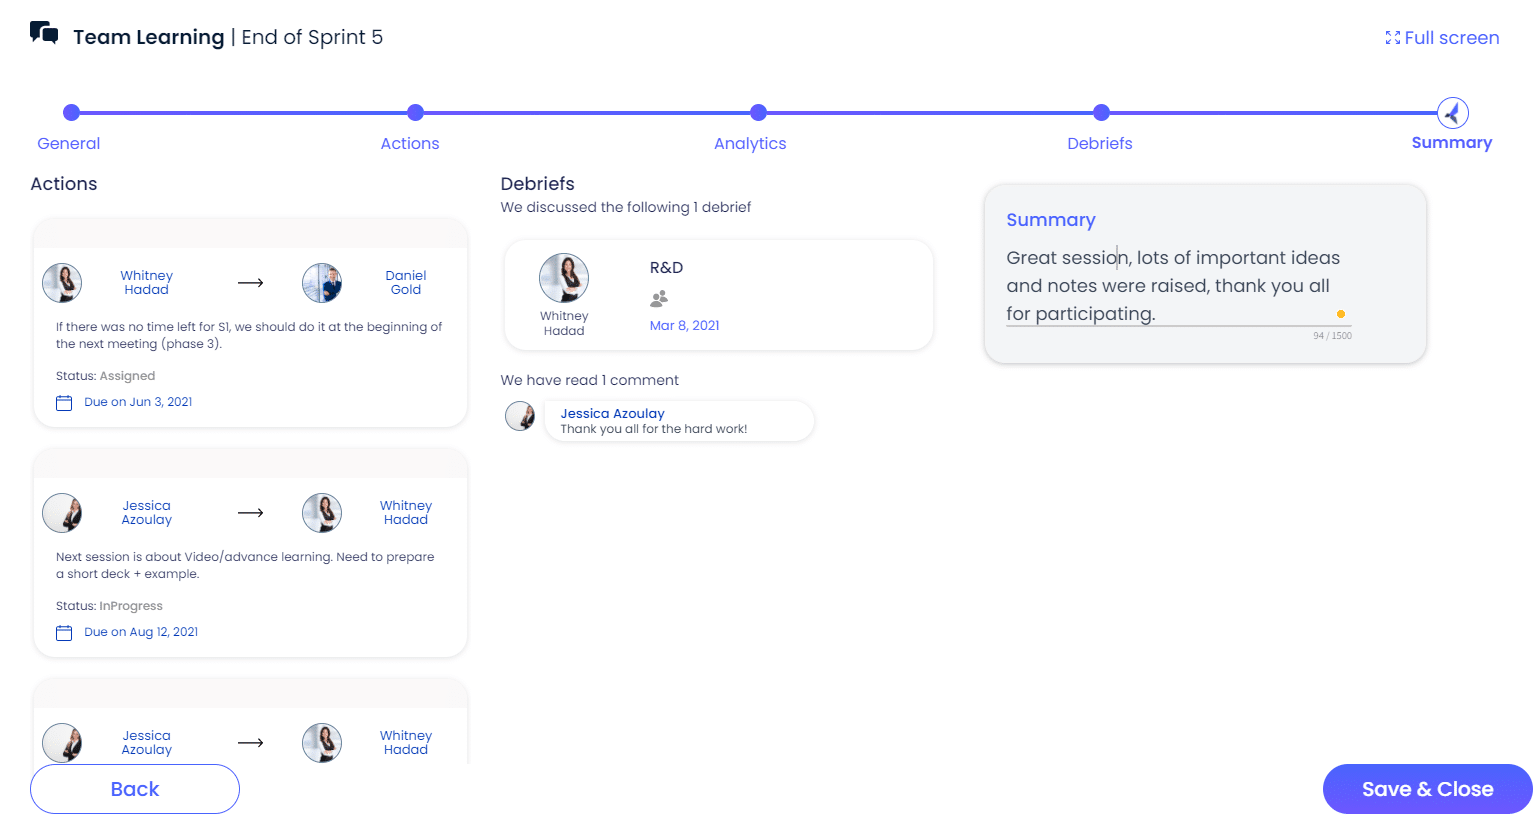
When it opens, you can view the team learning in full screen.
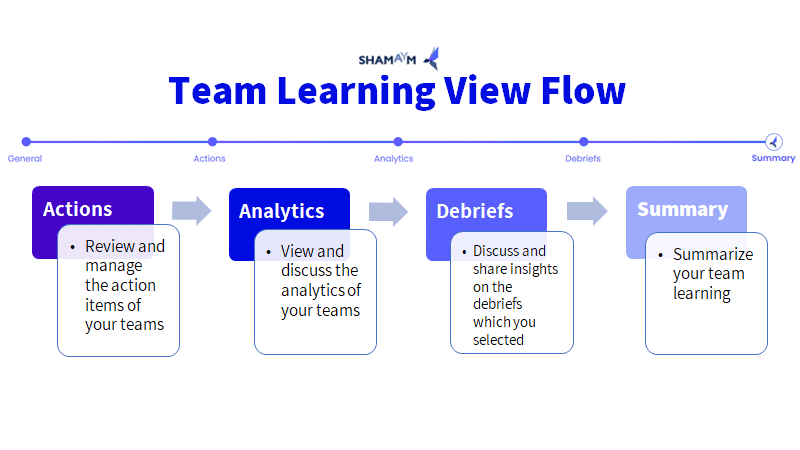
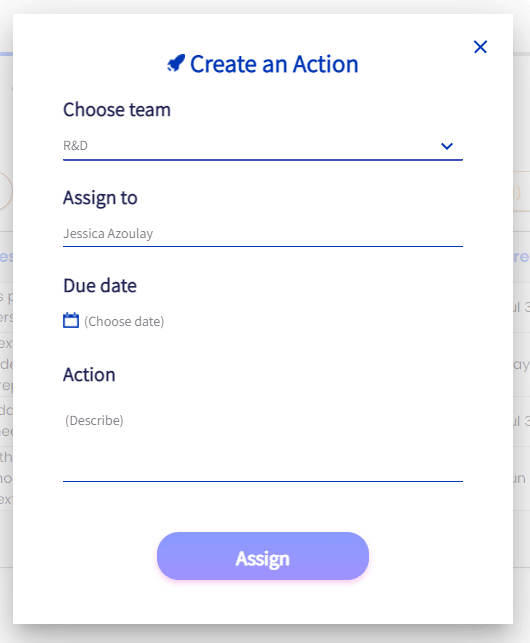
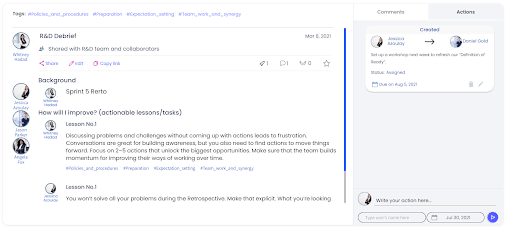
Actions
On this page you can review and manage the action items of your team. You will see all actions created until now.
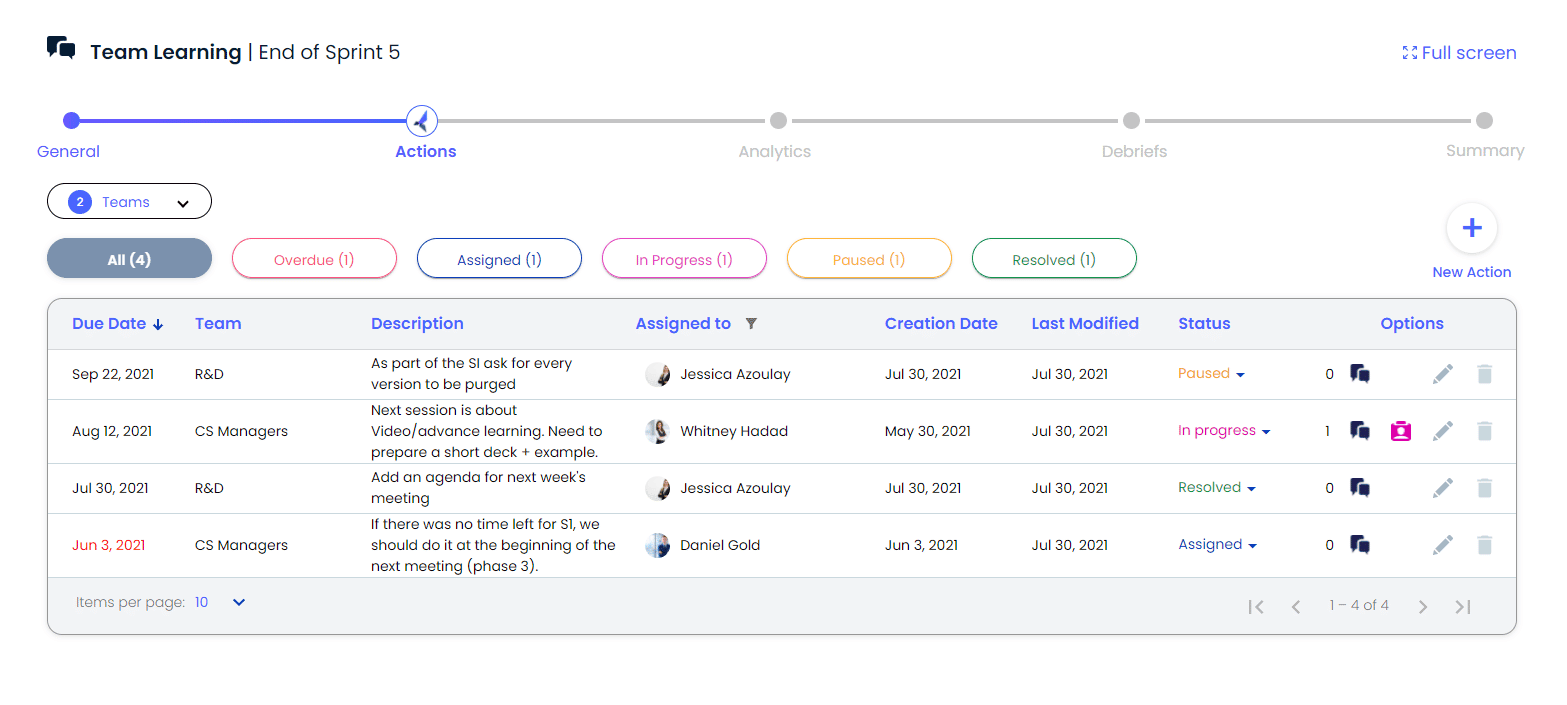
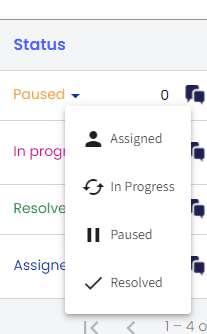
View settings
- You can filter the table by statuses- assigned, in progress, paused and resolved:


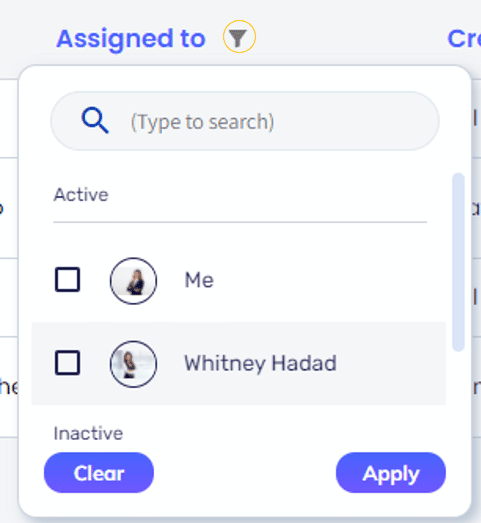
You can also see in addition all the overdue actions. - You can sort the table by due date, team, assignee, creation date, last modified, and status.


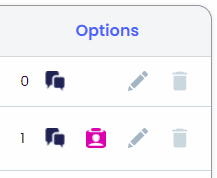
Additional options
- Create a new action by clicking on the plus icon


- You can edit, delete, comment or open the debrief

- You can change the status

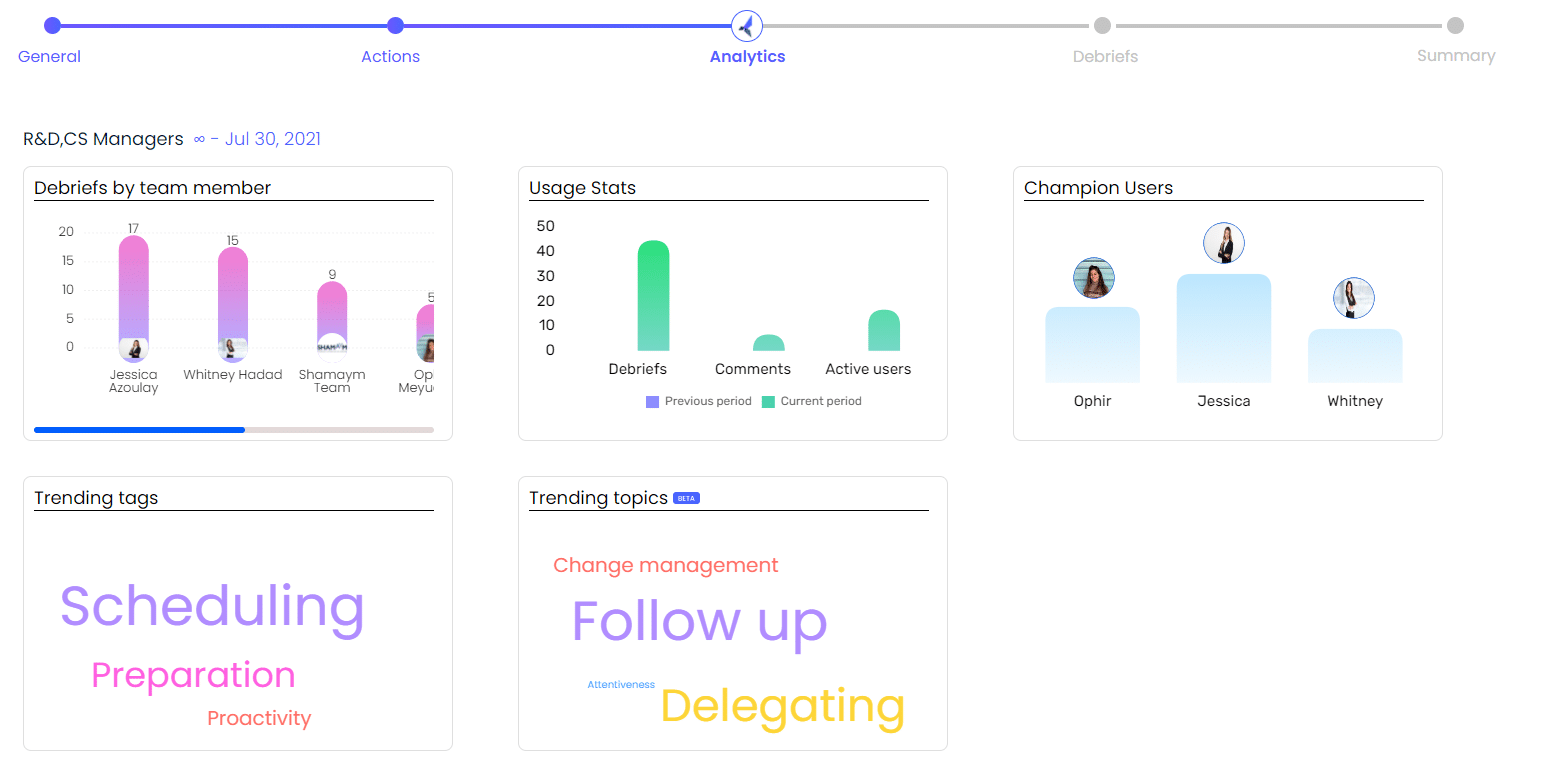
Analytics
View and discuss the analytics of your team.
- Debriefs by team member: The number of debriefs written by each team member during the defined time frame.
- Usage Stats: The number of debriefs, active users, and comments during the defined time frame, compared with the previous time frame.
- Champion Users: Team members who have the highest engagement in Shamaym.
- Trending tags: The most common tags used by team members.
- Trending topics: The most common topics discussed in debriefs by team members.
- Question response stats: A breakdown of responses to all the questions in the defined time frame.

Debriefs
Discuss and share insights on the debriefs which you selected.
You can add comments, assign action items, and perform all actions possible on the debrief view (share, embrace, copy link, etc.)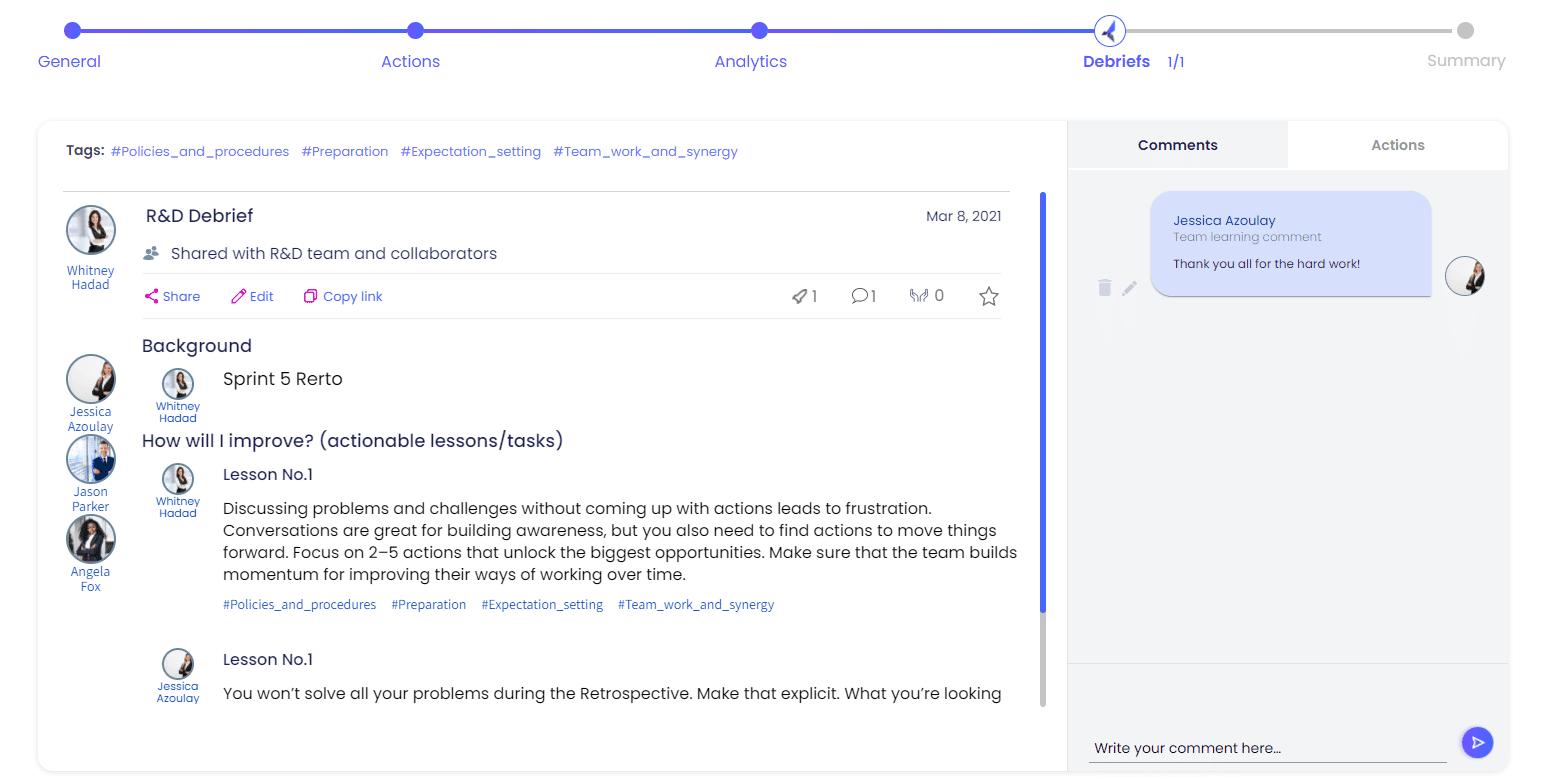
Summary
You can view all actions related to the debriefs which you discussed, see the comments made on the debriefs and add your own summary.