Learn how to invite new users to Shamaym and add users to your workspaces.
Managers and admins can add new and existing users in 2 ways: manually, or from file.
Adding users manually means that you can add one user at a time, and by uploading workspaces from file you can add multiple users.
Add users manually
-
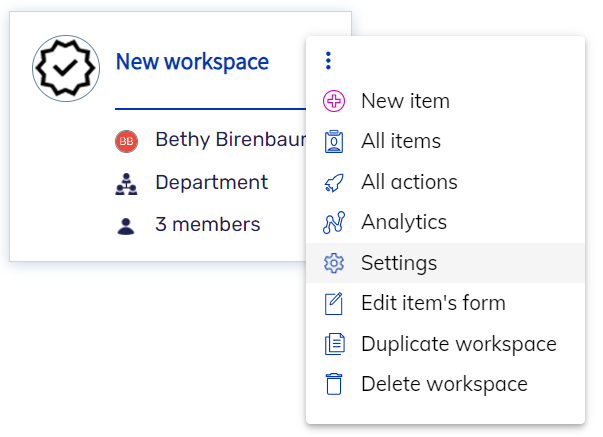
Click on the 3 dots menu > Settings

-
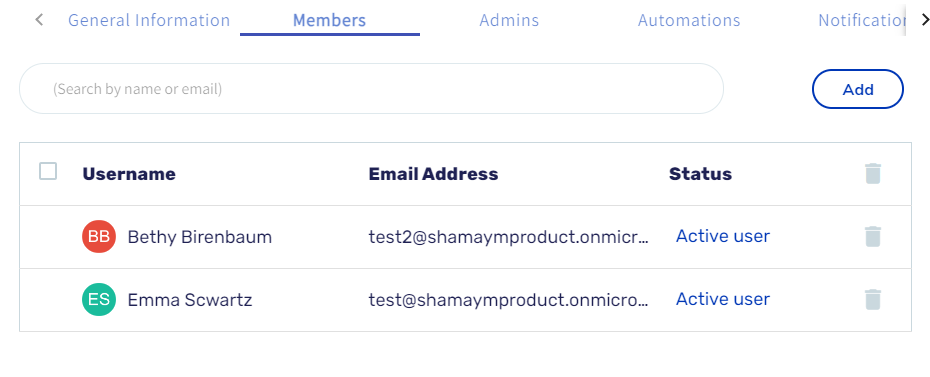
Go to the Members tab to add members to your workspace.
To add existing users, search by name or email in the search bar, click on the user, and click Add.


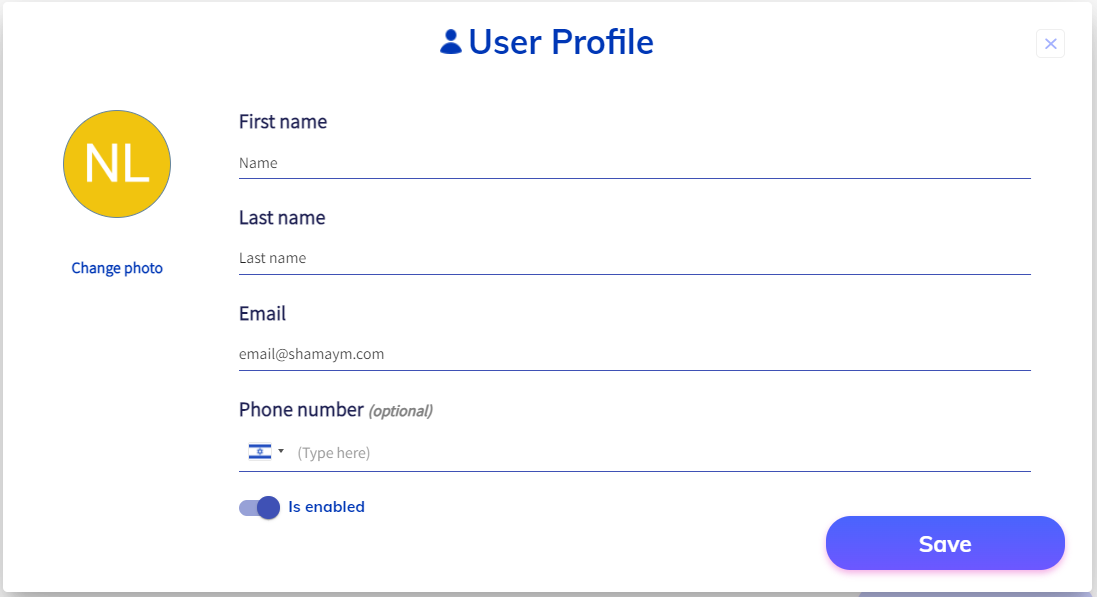
To add new users, click on the search bar and then Add new user

Fill in the user’s name, last name, and email address. You can add a phone number and a profile picture if you’d like.

Click Save. You may send an invitation to the new users by ticking the checkbox and clicking Send Invites.

-
Users’ status
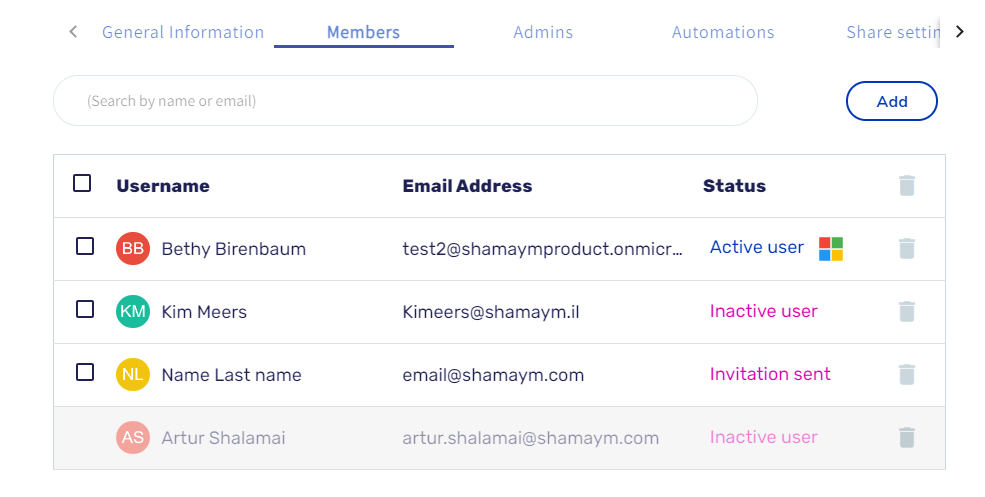
There are 4 users’ statuses:

-
Inactive means this user didn’t receive an invitation to Shamaym and hasn’t logged in yet. In order to activate this user’s account, you should send this user an invitation, as explained above.
-
Invitation sent means this user received an invitation to Shamaym but hasn’t logged in yet.
-
Active user means this user has already activated their Shamaym account.
-
Disabled user means this user has been disabled manually and can’t log in to Shamaym. If you have an unnecessary account on your workspace, you can delete or disable it.
-


Add users from file
We created a template for you to use in order to load workspaces from file.
Please download this Excel file and fill it in according to the instructions described below.
Once the file is ready:
-
Click on the workspace card

-
Click on the + icon

-
Select Add users from file

-
Select the Excel file which you filled in
-
The users should be created.

If you see any error, there might be something wrong in the process of filling in the template. Please go over the instructions below and make sure you did all the steps correctly. -
To send invitations to new users:
-
Click on the 3 dots menu > Settings
-
Go to the Members tab
-
Tick the checkbox and click Send Invites.
-
Users’ status
There are 4 users’ statuses:
-
Inactive means this user didn’t receive an invitation to Shamaym and hasn’t logged in yet. In order to activate this user’s account, you should send this user an invitation, as explained above.
-
Invitation sent means this user received an invitation to Shamaym but hasn’t logged in yet.
-
Active user means this user has already activated their Shamaym account.
-
Disabled user means this user has been disabled manually and can’t log in to Shamaym. If you have an unnecessary account on your workspace, you can delete or disable it.
-
-


Instructions for filling in the template:
-
Note: you can upload multiple users at a time (no limitation), just make sure each user is in a separate row.
Delete any redundant rows of members if you don’t need them.

-
No need to fill in the workspace’s details
-
Fill in the users’ details:
Enter valid email, name, last name, and phone number (optional). Keep the IsEnabled “TRUE”.
 Tip: if you are adding users who already have a Shamaym account, you may skip the name & last name fields, and just enter their email address.
Note: If you are adding phone numbers, make sure you add an area code for each number (+972 for example) -
Before loading:
-
Make sure you entered all the required data and that everything you’ve entered is valid (Usernames, Emails, Phone numbers, Enabled status)
-
Review the instructions again and make sure you haven’t missed anything
-
Delete all empty/ redundant tabs
-
Delete all empty/ redundant rows
-
Make sure you haven’t added any information that wasn’t in the template, and make sure you haven’t changed the template’s texts and terms
-